Back to top
Make a Diagram with Gliffy Online
Gliffy is an easy-to-use diagramming tool with tons of templates, shapes, and icons — plus the ability to add your own. There are plenty of reasons you might want to include a custom graphic in your diagram. For example, you might want to:
- Make a proposal look more professional for a presentation
- Show how your business or product works within a network
- Add your logo to a diagram your customers will see
But before you can add a custom icon or logo to your diagram, you have to make a diagram. For this tutorial, you'll want to start your free trial of Gliffy. In just a few clicks, you'll be ready to drag and drop to build your own diagram.
Back to top
Video: How to Add Custom Shapes to Gliffy
Back to top
How to Make a Diagram with Your Own Shapes
Once you're logged in to Gliffy, there are a few ways to customize your diagram shapes. Gliffy comes pre-loaded with thousands of shapes, so you can always check what's available under "More Shapes" in the lower left corner of the Gliffy editor. But enough of that — here's how to add your own.
1. Gather the Files You'll Add to Gliffy
We’ve made it easy to import any SVG, JPG, or PNG image or library of images into Gliffy. We recommend importing SVG images whenever possible because they can be enlarged to any size without losing their resolution.
If you need inspiration, a few of our favorite sources for icons are IcoMoon, The Noun Project, and Icon Finder.
2. Drag and Drop Your File Onto the Canvas
We're a drag and drop diagramming tool, what did you expect? Just like adding files to Word docs or emails, you can drag and drop a single file into the Gliffy editor to load it in. Alternatively, you can go to File > Import in the menu bar to select an SVG, JPG, or PNG to load in.
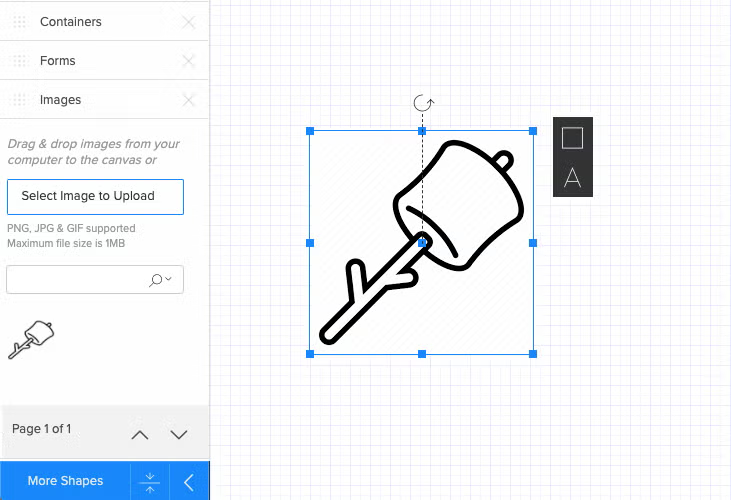
If you don't want to add your image right away, you can also click Images in the list of shape libraries to the left, then select your image there. It will populate in like a pre-loaded Gliffy shape so that you can drag and drop it into your diagram when you're ready.
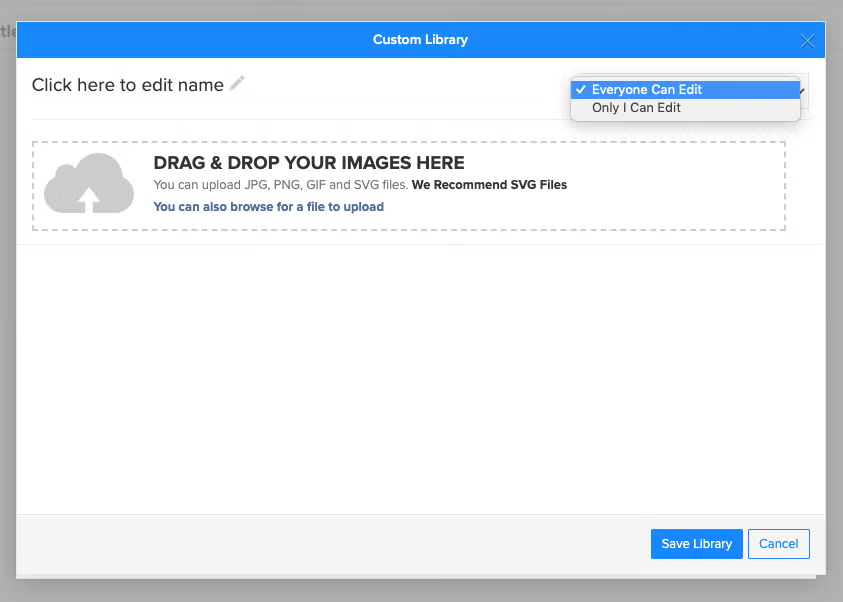
3. Build a Custom Shape Library in Gliffy
If you have a whole set of images you'd like to import all at once, set up a custom library that can be shared and edited by anyone on your team. This is helpful for icons like logos or tools your team uses and you can use them like any other shape in the Gliffy Editor.
Just click the "More Shapes" button at the bottom of the left sidebar like you're going to open a new set of shapes, then "Add Custom Shape Library" in the section that pops up. Give your set a name (we can't save anything untitled!) and then drag and drop all the shapes you want to include into the highlighted area. Click Save Library and you're good to go.
To organize your custom library, select the gear icon that appears when you hover over its name in the shape list. From there, you can edit, remove, or permanently delete it. Now that you've got your shapes set up, you can make a diagram with your own logos or images.
Here are some extra tutorials if you want to make a particular type of diagram:
Please note, there is currently a limit of 30 shapes per library and 1MB size limit per image.
Try in Confluence