Whether you’re diagramming technical processes or complex structures, connectors are one of the most important elements of any diagram. They show the flow of movement from one item to another and illustrate the connections between different parts of a system.
Since connectors are so important, using them properly is a vital skill to learn as you create visual documentation. Here are a few tips and tricks that will help you become a pro in no time.
Follow along by starting your free evaluation of Gliffy for Confluence!
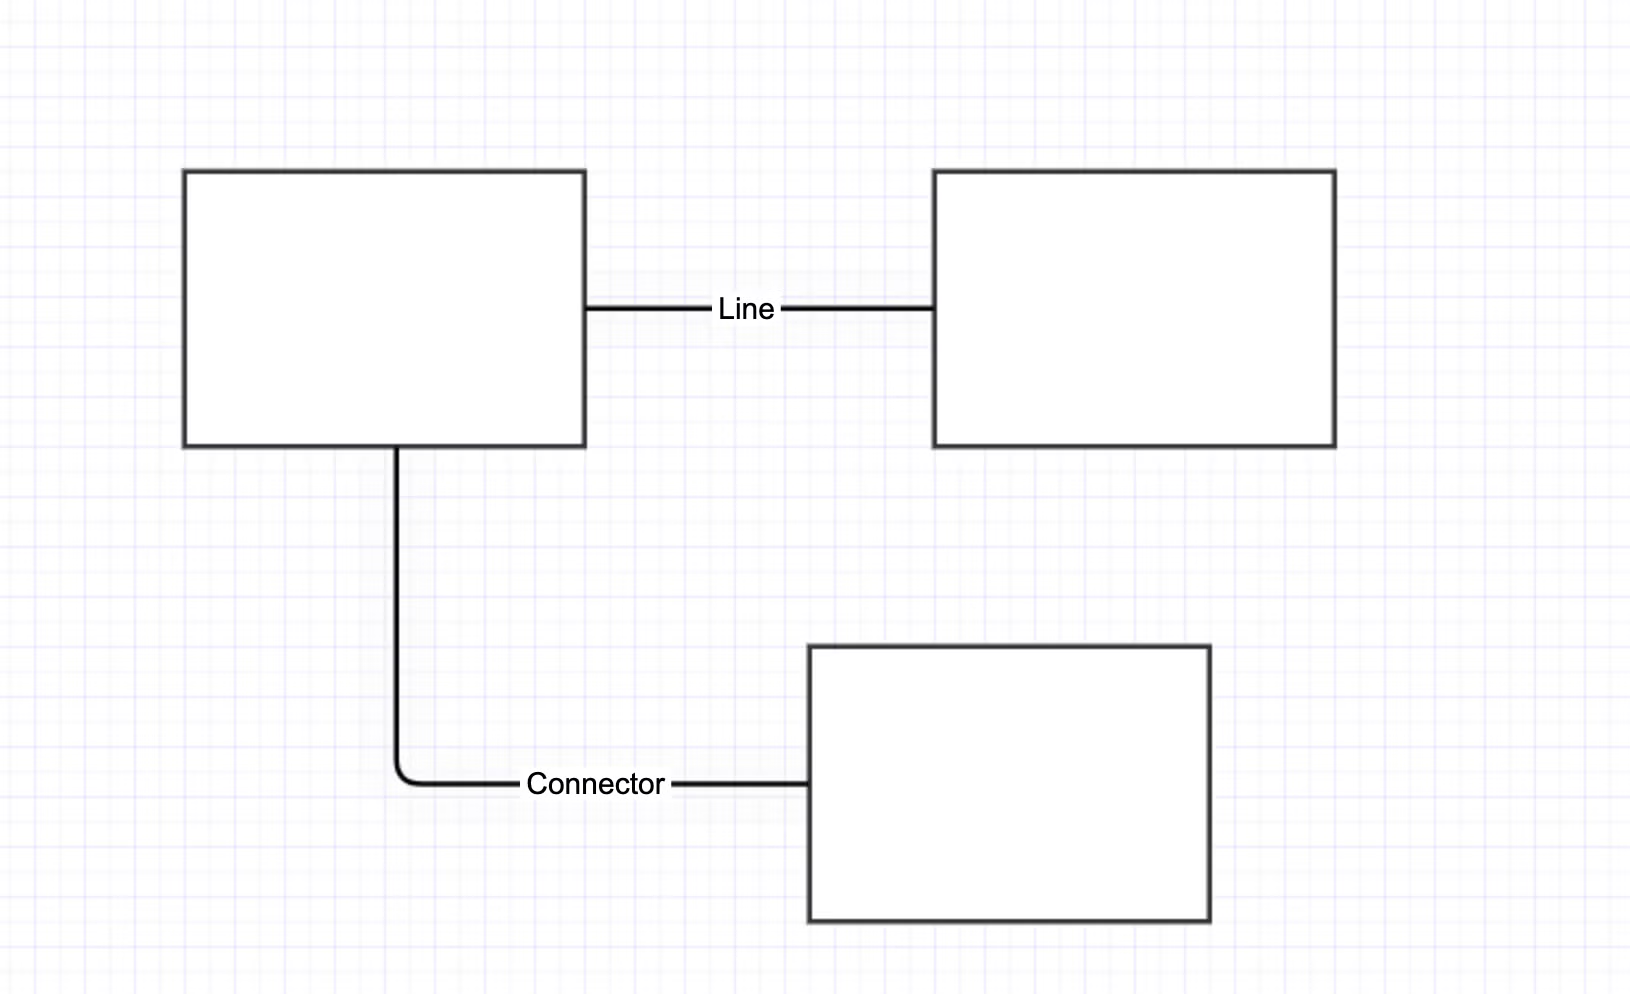
Back to topConnector vs. Line Tool
Lines and connectors both allow you to connect objects in your diagram, but they work a little differently.
The line tool allows you to draw only perfectly straight lines between shapes.
With the connector tool, you draw lines that can curve or turn at right angles.
To make sure that your connector or line will move along with your shape as you adjust it, make sure a green circle appears around the endpoint as you draw the connector or line between shapes. This indicates that the line has properly linked to the shape.
To switch between the line and connector tools easily, you can use the following keyboard shortcuts:
Connector: CMD + 3 (Mac), CTRL + 3 (Windows)
Line: CMD + 6 (Mac), CTRL + 6 (Windows)
How to Use Connectors in Gliffy
When you hover over a line or connector in Gliffy, you’ll see it faintly highlighted in blue, making it easy to tell which line in a complex diagram you’re selecting before you start moving shapes around or adding text onto the line.
Once you’ve got the right line selected, here are a few ways to customize the appearance and function of a connector.
Change Connector Colors
To change the color of a connector, click the properties button — it looks like a slanted line. From there, you’ll be able to customize the connector’s color, style, weight, and more.
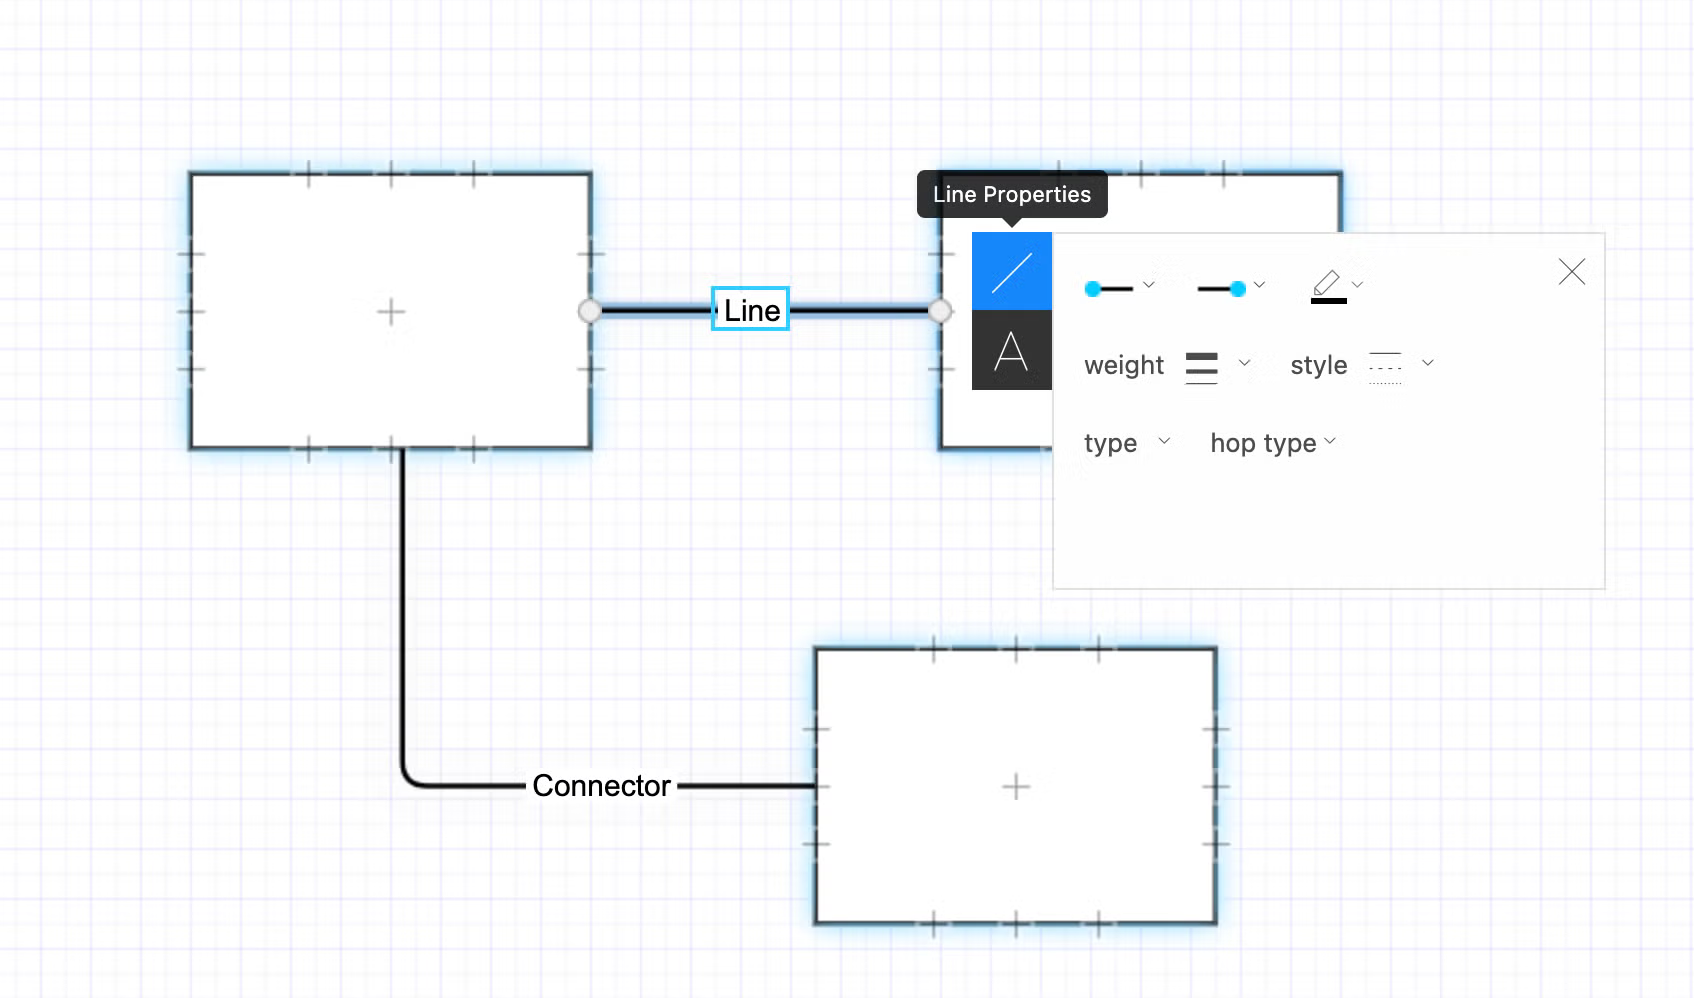
If you’re looking for consistency across your diagram, when you finish customizing one connector to your liking, select the eyedropper tool to copy its style, then select another connector to make its appearance match.
Change Connector Arrow Tips
The properties panel that you used to change the color and style of your connector will also allow you to change the type of arrow tip or to add an arrow tip.
When you add an arrow tip, it will automatically be added to the side that you ended on when drawing the connector, so keep this in mind as you make connections between shapes.
Add a Shape To A Line or Connector
You can drag and drop shapes right into any connector line and it will automatically be inserted into the line.
To add a new shape to a flowchart that automatically connects to the previous one without needing to use the connector tool, just select the arrow on any side of a shape and choose your new shape from the options that appear.
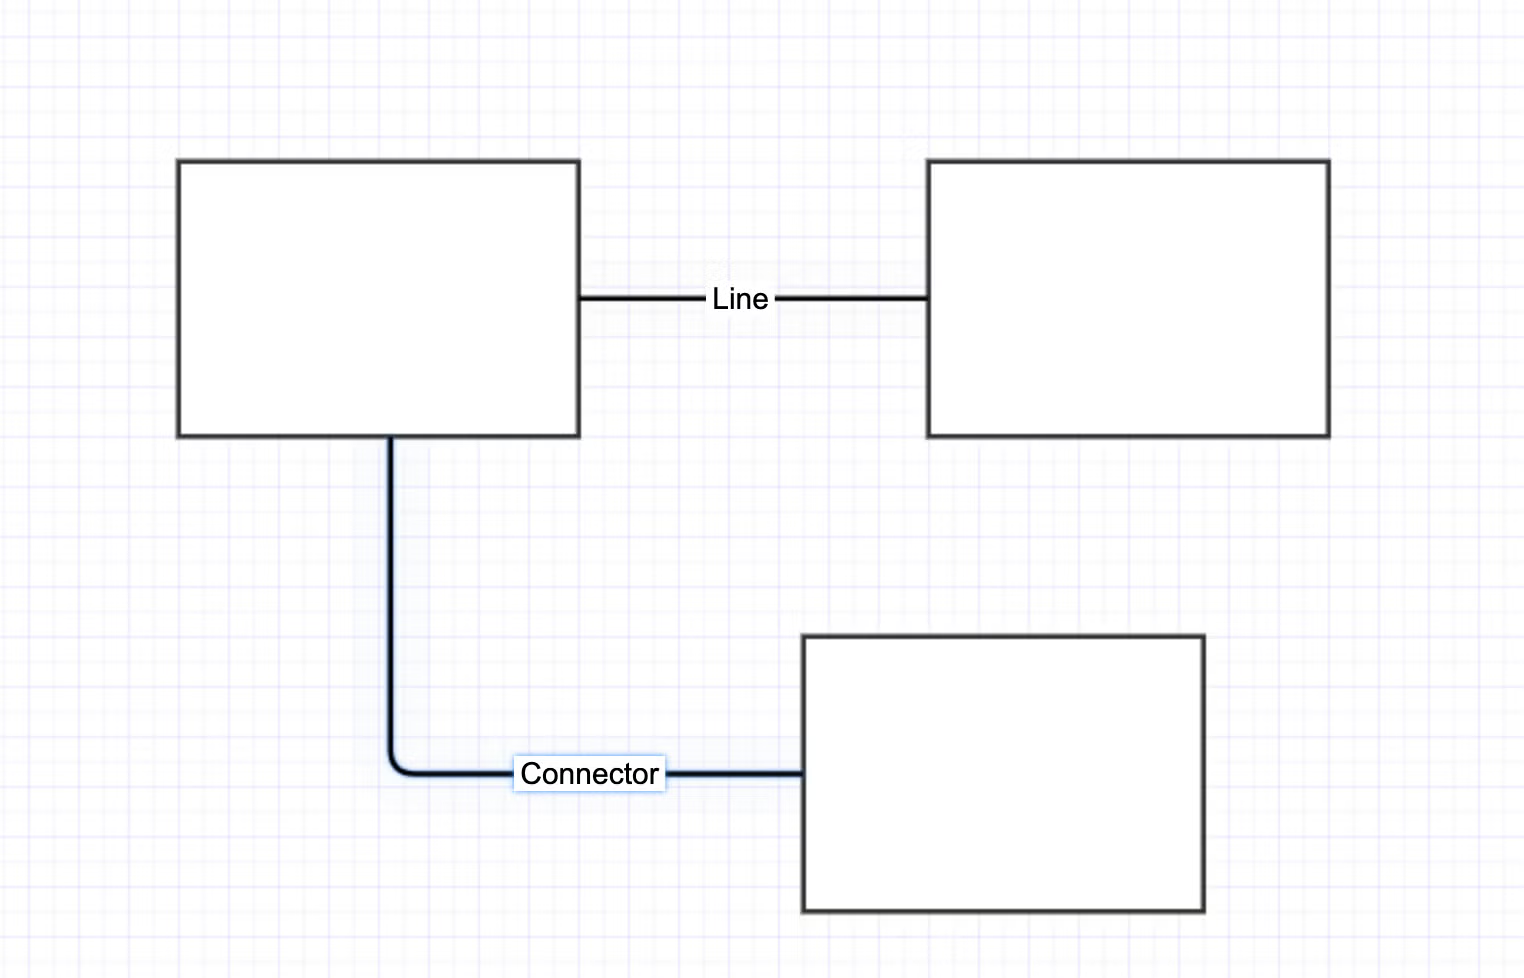
Add Text to Connectors
To add text directly to a connector, just click on any line or connector and start typing!
If you need to move the text, click the line again and drag and drop the box that appears around the text. You can keep the text directly on top of the line or offset it a bit, but it will stay linked to that connector.
 Back to top
Diagram-Specific Connectors
Some diagram types require specific kinds of connectors. These are available in Gliffy, but using them might work a little differently from creating a regular line or connector.
Entity-relationship diagrams are one example of this. You’ll find most types of ERD arrows in the Entity-Relationship shape library, but if you can’t find the specific type that you need, you can customize them by inserting any pre-made ER arrow and selecting the properties button to choose any type of arrow tip.
Some UML diagram types also require specific types of arrows, such as those that also require cardinality. To add cardinality to UML diagram lines, drag any UML connector line from the shapes panel to the drawing canvas. Cardinality boxes will appear on each side, and you can double click those boxes to add cardinality.
Back to topReady to Make Some Connections?
With these connector skills, you’ll be ready to illustrate all the relationships between elements of your technical diagrams.
If you don’t have access to Gilffy, make sure to add it to your Confluence space today!