Documenting your work takes time you don’t always have, but a lack of documentation eventually leads to a decline in collaboration and productivity.
What if there was a quicker way to document systems and code without having to drag, drop, and connect each shape manually?
Mermaid offers that solution with its code-based approach to technical diagramming, making it faster to create the documentation that connects your team and supports your future development efforts.
In this blog, we’ll explore the value of Mermaid diagramming, its key use cases, and how to generate Mermaid diagrams in Gliffy for Confluence, including code samples you can use as starting points for your own diagrams.
Start your free evaluation of Gliffy to jump into code-based diagramming:
Back to top
What Are Mermaid Diagrams?
Mermaid diagrams are code-based diagrams that represent structures and processes, generated using Markdown-inspired text definitions that are easy to write and modify.
Mermaid is a diagramming framework rather than a specific type of diagram. Many types of diagrams critical to software documentation can be generated using Mermaid code, from UML diagrams to entity-relationship diagrams.
Back to topWhy Do Developers Use Mermaid and Other Text-Based Diagrams?
Speed and Scalability
It’s much faster for developers to express their ideas through code that can be translated into visuals through text-based diagramming frameworks like Mermaid.
Knowledge workers such as senior developers are often busy with high-priority projects that don’t allow them much time to create documentation.
Mermaid provides a way to automatically generate diagrams based on written code that represents a system or process. This approach to diagramming, part of a larger movement known as “diagrams as code,” allows teams to develop visual documentation quickly and efficiently.
Simplified Maintenance
When you’re short on time, dragging and dropping shapes isn’t a sustainable diagramming method, and any documentation that exists will quickly become outdated.
With Mermaid and other methods of text-based diagramming, updating diagrams is straightforward and efficient, as each diagram is defined in plain text. Users can quickly modify the code to reflect changes, eliminating the need to redesign visuals from scratch.
This approach enables seamless integration with version control systems like Git, so every update is tracked, differences can be reviewed, and previous versions restored if needed.
Back to topMermaid vs. GUI Diagramming Tools
Mermaid is a valuable tool for faster diagram creation, but it isn’t the right fit for every team. GUI (Graphic User Interface) tools that allow the user to interact with shapes and connectors to build a diagram may be a better solution in certain scenarios.
When to Use Mermaid Diagramming
- Code-First Culture: For teams familiar with code-like syntax, Mermaid offers a fast and straightforward way to create diagrams.
- Automation: Mermaid’s syntax can be embedded into automation pipelines, making it a great choice for generating diagrams dynamically as part of larger processes.
When to Use a GUI Tool
- Rapid Brainstorming: GUI tools allow for quick, freeform diagram creation where ideas can flow without worrying about syntax.
- Non-Technical Users: These tools are intuitive and accessible, making them great for teams or individuals less comfortable with text-based input.
With Gliffy for Confluence, even non-technical users can enjoy the benefits of text-based diagramming thanks to our AI diagramming functionality. Learn more about AI diagrams >>
The Hybrid Approach: Mermaid and Graphic Interface in One Tool
In many cases, the best solution involves using both Mermaid and GUI-based diagramming strategically.
For example, in Gliffy for Confluence, you can generate and edit a diagram using Mermaid code. Then, you have the option to convert the generated diagram to a traditional diagram.
This allows you to manipulate the diagram by dragging and dropping shapes, clicking on shapes to modify the text within them, and make other edits in the way you would with any other GUI tool.
Using Gliffy as the hybrid bridge between code-based and traditional diagramming gives you the flexibility to combine the strengths of both methods while keeping your workflows organized and efficient.
Back to topMermaid Diagram Tutorial Video
Watch this quick tutorial to learn how to generate Mermaid diagrams in Gliffy! Make sure you’ve started your free trial in Confluence Cloud or Data Center so you can follow along.
How to Generate Mermaid Diagrams in Gliffy
Mermaid diagrams work a little differently than any other way to diagram in Gliffy. To learn how to use Gliffy’s Mermaid diagramming functionality, follow along with these step-by-step instructions.
1. Select the Lightbulb Icon
When you open a new Gliffy diagram, you’ll notice a lightbulb icon on the far left side of your screen. Click on this icon to see more ways to generate diagrams.

2. Enter the Editing Modal
Selecting “Mermaid” will bring you into the diagram editing modal. This is where you’ll create and modify your diagram.
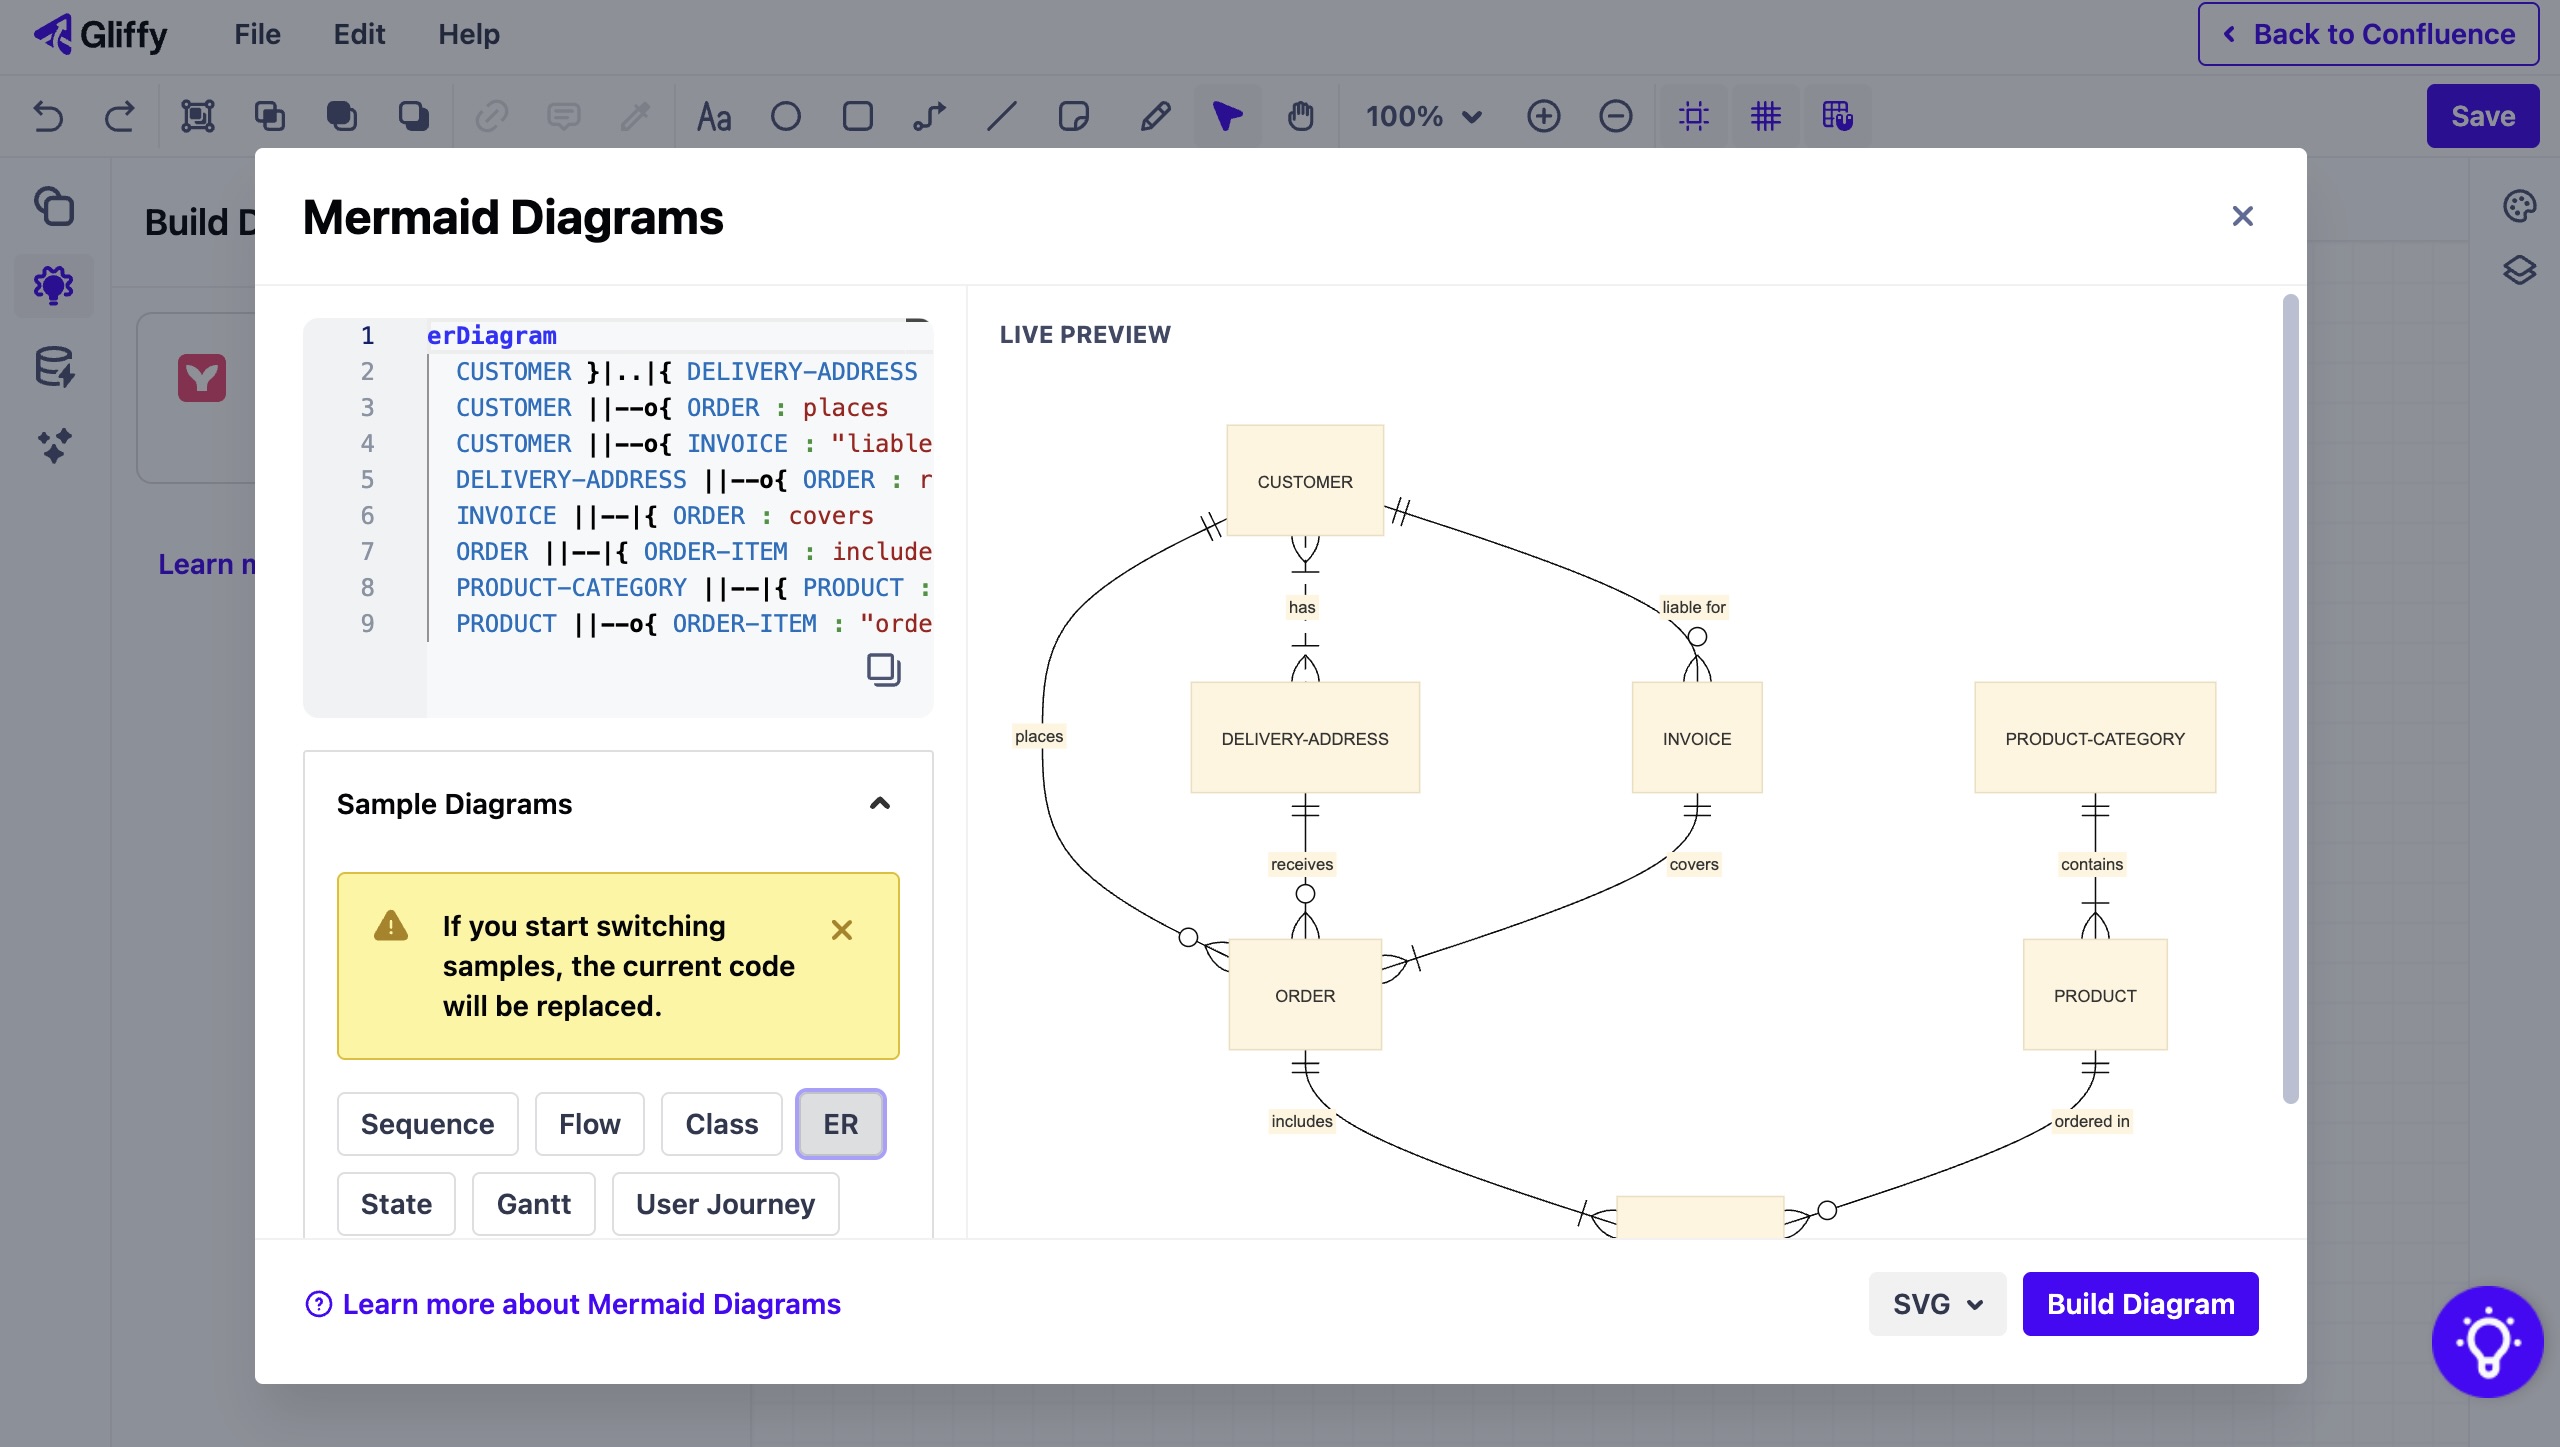
3. Select And Modify Your Diagram
Once you’re in the editing modal, choose the diagram type you want and modify the code as desired. The sample diagrams you’ll find in the editing modal are short and simple, but if you’re looking for more detailed examples to start from, keep reading — we'll share a few samples later in this tutorial.
💡 Diagramming Tip: AI can help you generate diagrams! For example, you can ask ChatGPT to give you Mermaid text for an entity-relationship diagram with certain parameters, then copy and paste the result it provides into Gliffy's Mermaid editor.
AI isn’t always accurate, so you may have to make some changes after pasting the generated text, but this will give you a quick and easy starting point for your Mermaid diagram.
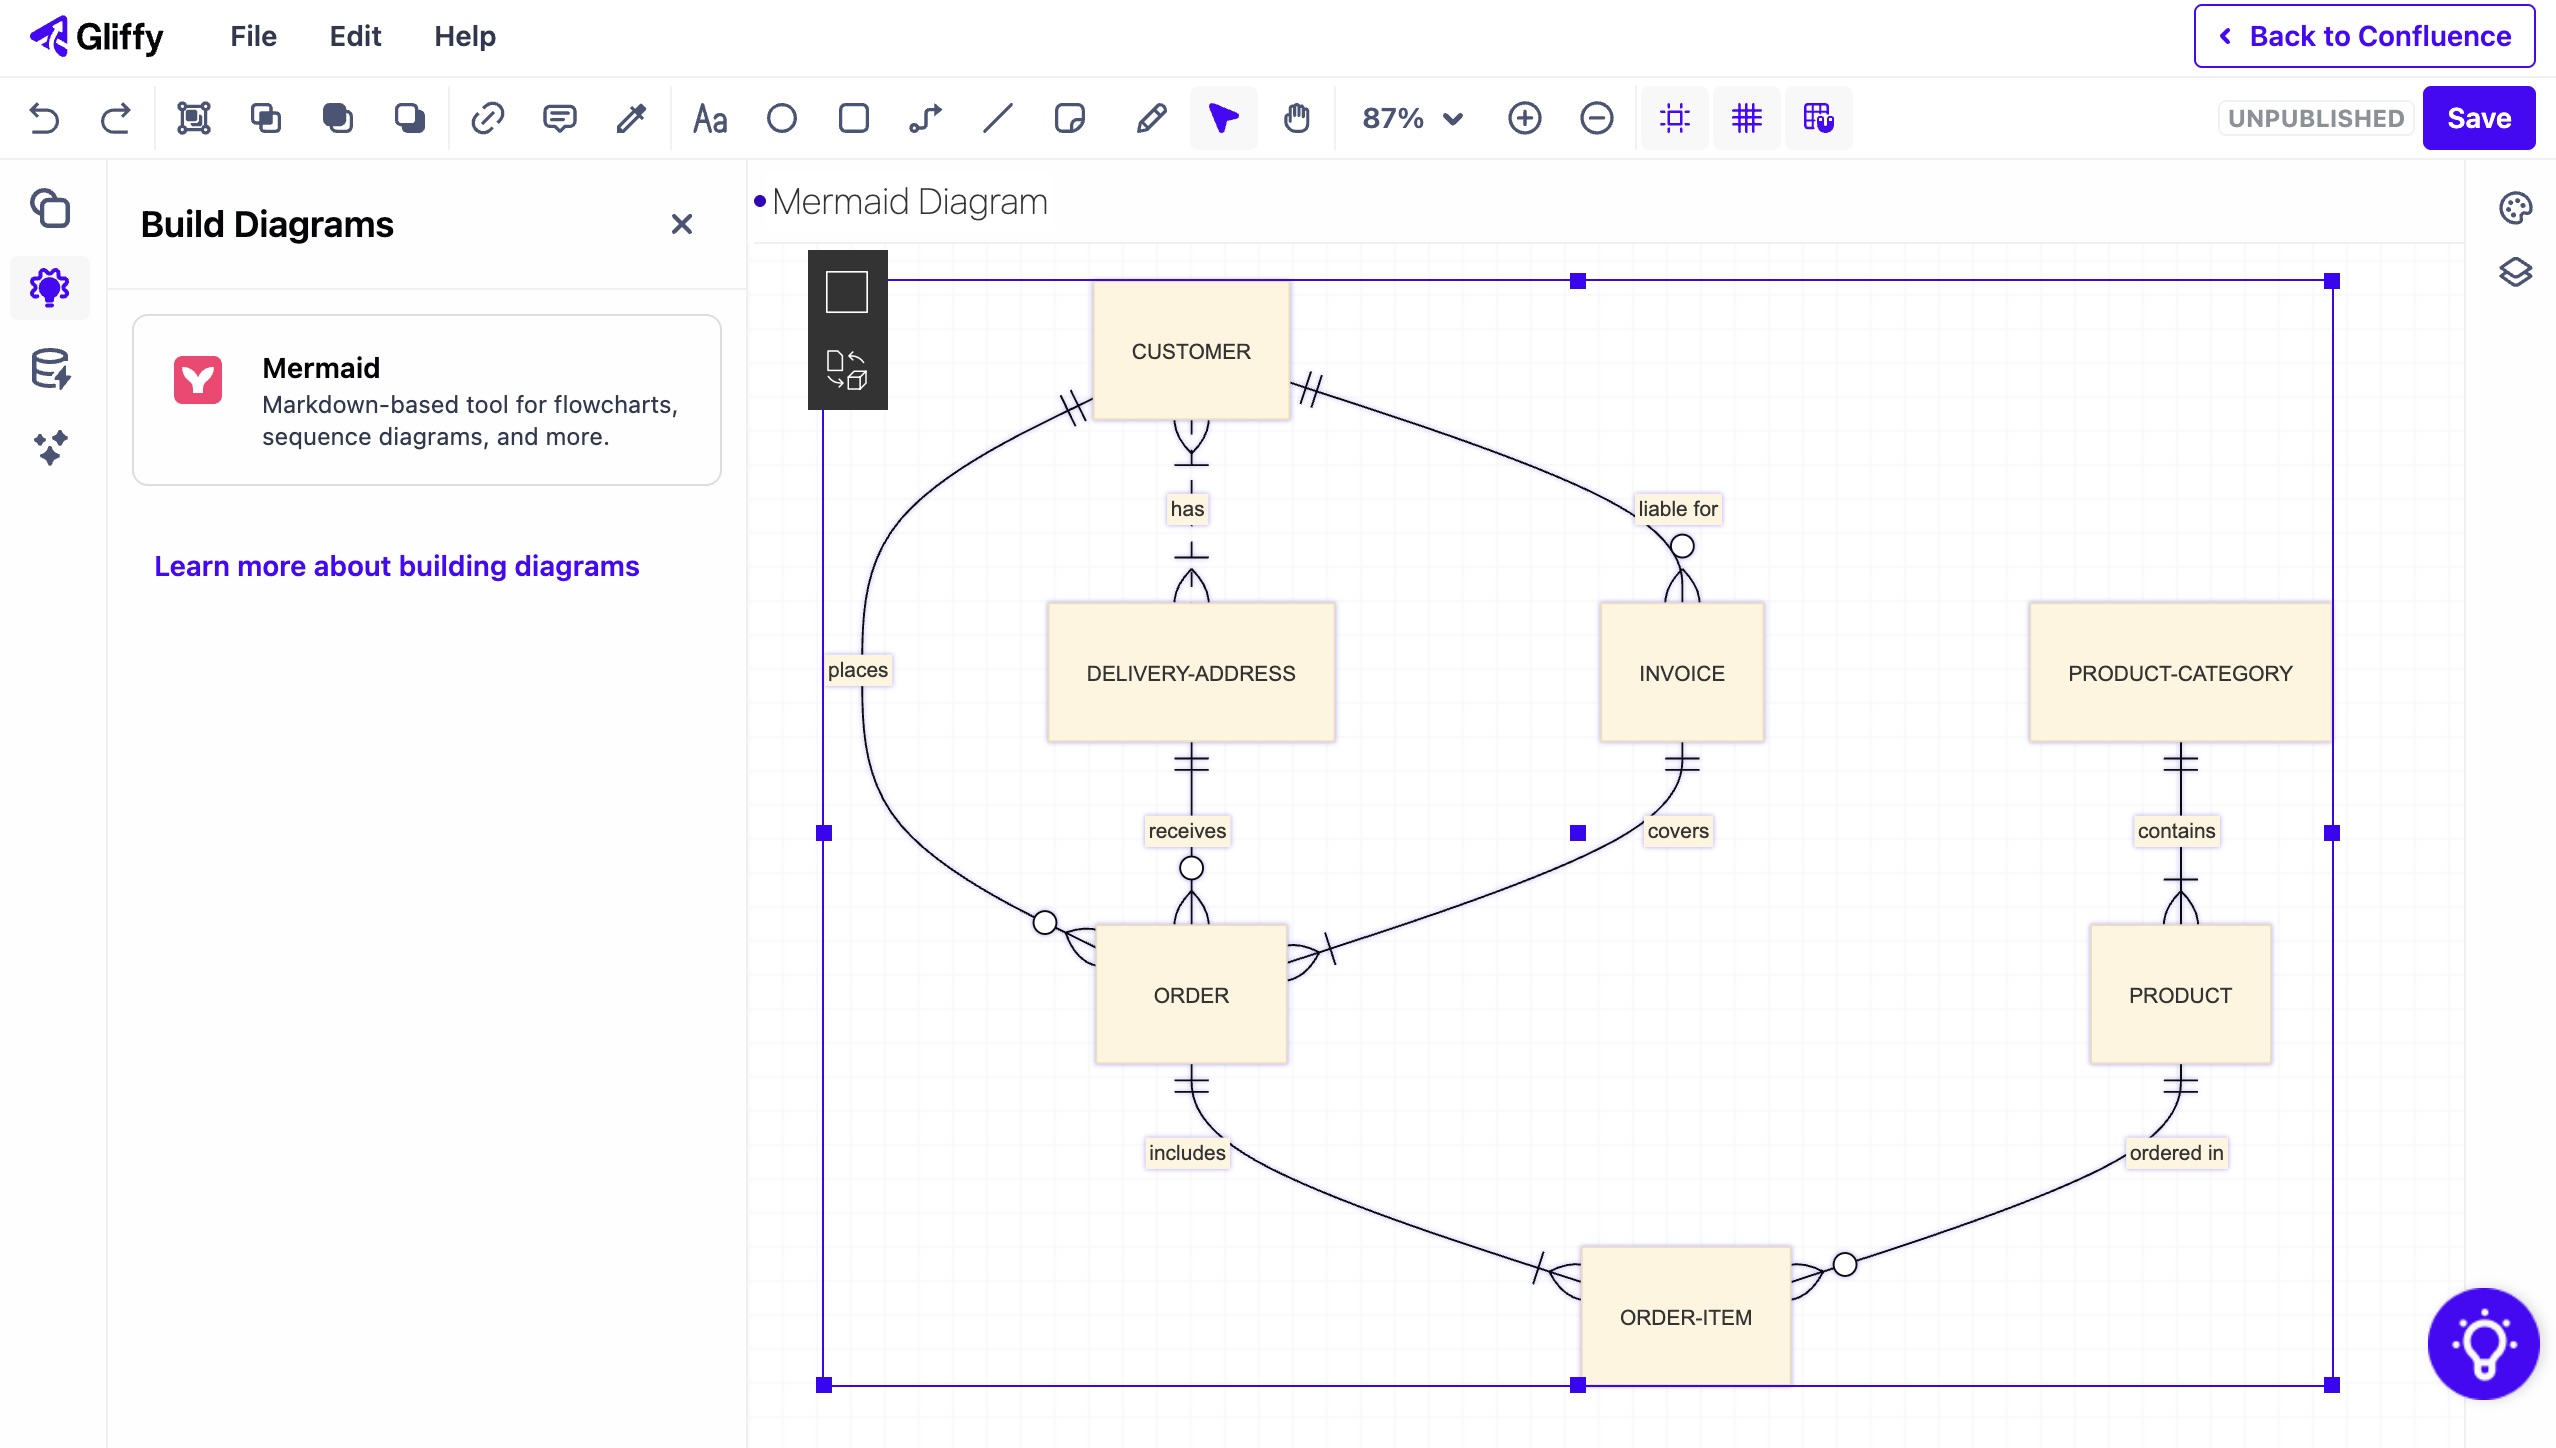
4. Add the Diagram to Your Canvas
Once the diagram contents have been modified to your liking, click “Build Diagram” in the lower left-hand corner of the editing modal to add the diagram to your Gliffy canvas. If you need to make further edits to the diagram, you can double-click on it to re-enter the editing modal.
If you’ve used Gliffy before, you’re probably familiar with its drag-and-drop interface, but Mermaid diagrams work a little differently. You can’t edit a Mermaid diagram directly from the canvas like you would any other shape — you’ll have to re-enter the editing modal in order to change the diagram.
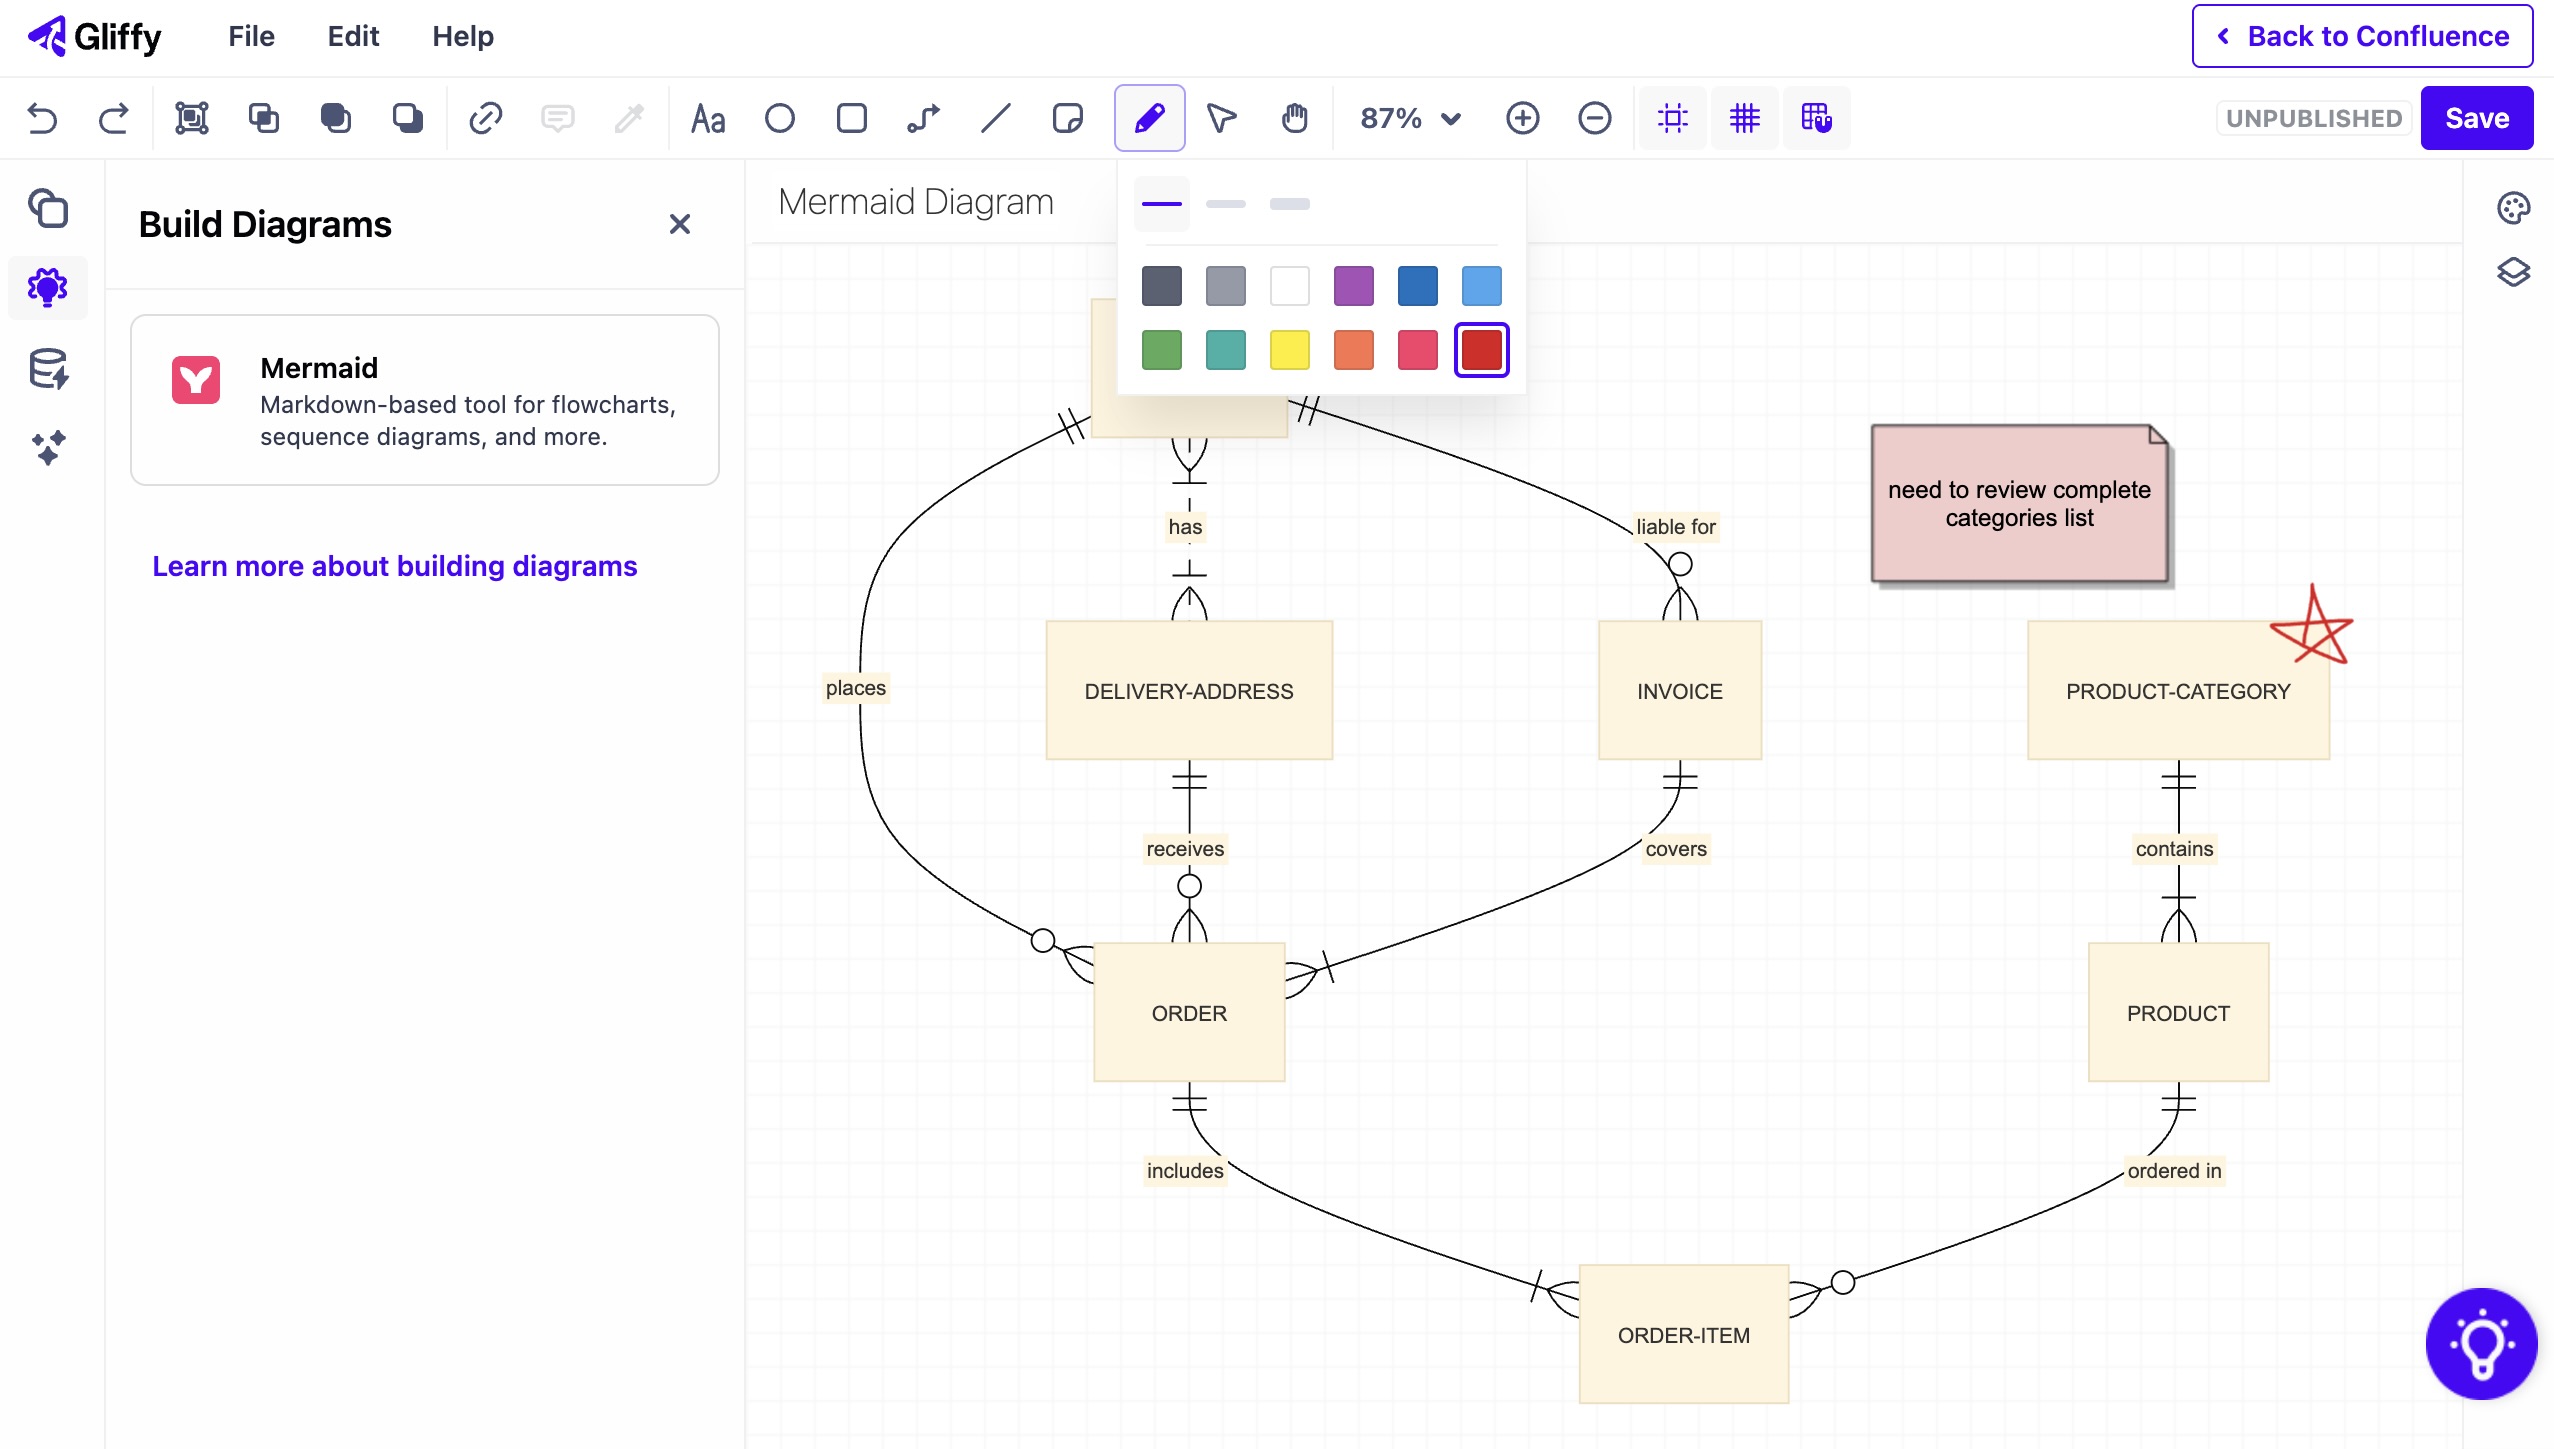
5. Add the Finishing Touches
Want to add extra shapes to your diagram? Navigate back to the shape library by clicking the square icon above the lightbulb icon on the left panel of your screen.
Want to edit your Mermaid diagram by moving each shape individually, like a typical Gliffy diagram? Just right-click on the diagram and select "Convert to Gliffy."
You can also add sticky notes explaining parts of your diagram or annotate your diagram using the freehand drawing tool.
Once your diagram is complete, simply save and return to Confluence!
Back to topMermaid Diagram Examples
Looking for a template to build your Mermaid diagram from? Here are a few examples of technical diagram types and the code used to generate them.
Sequence Diagram
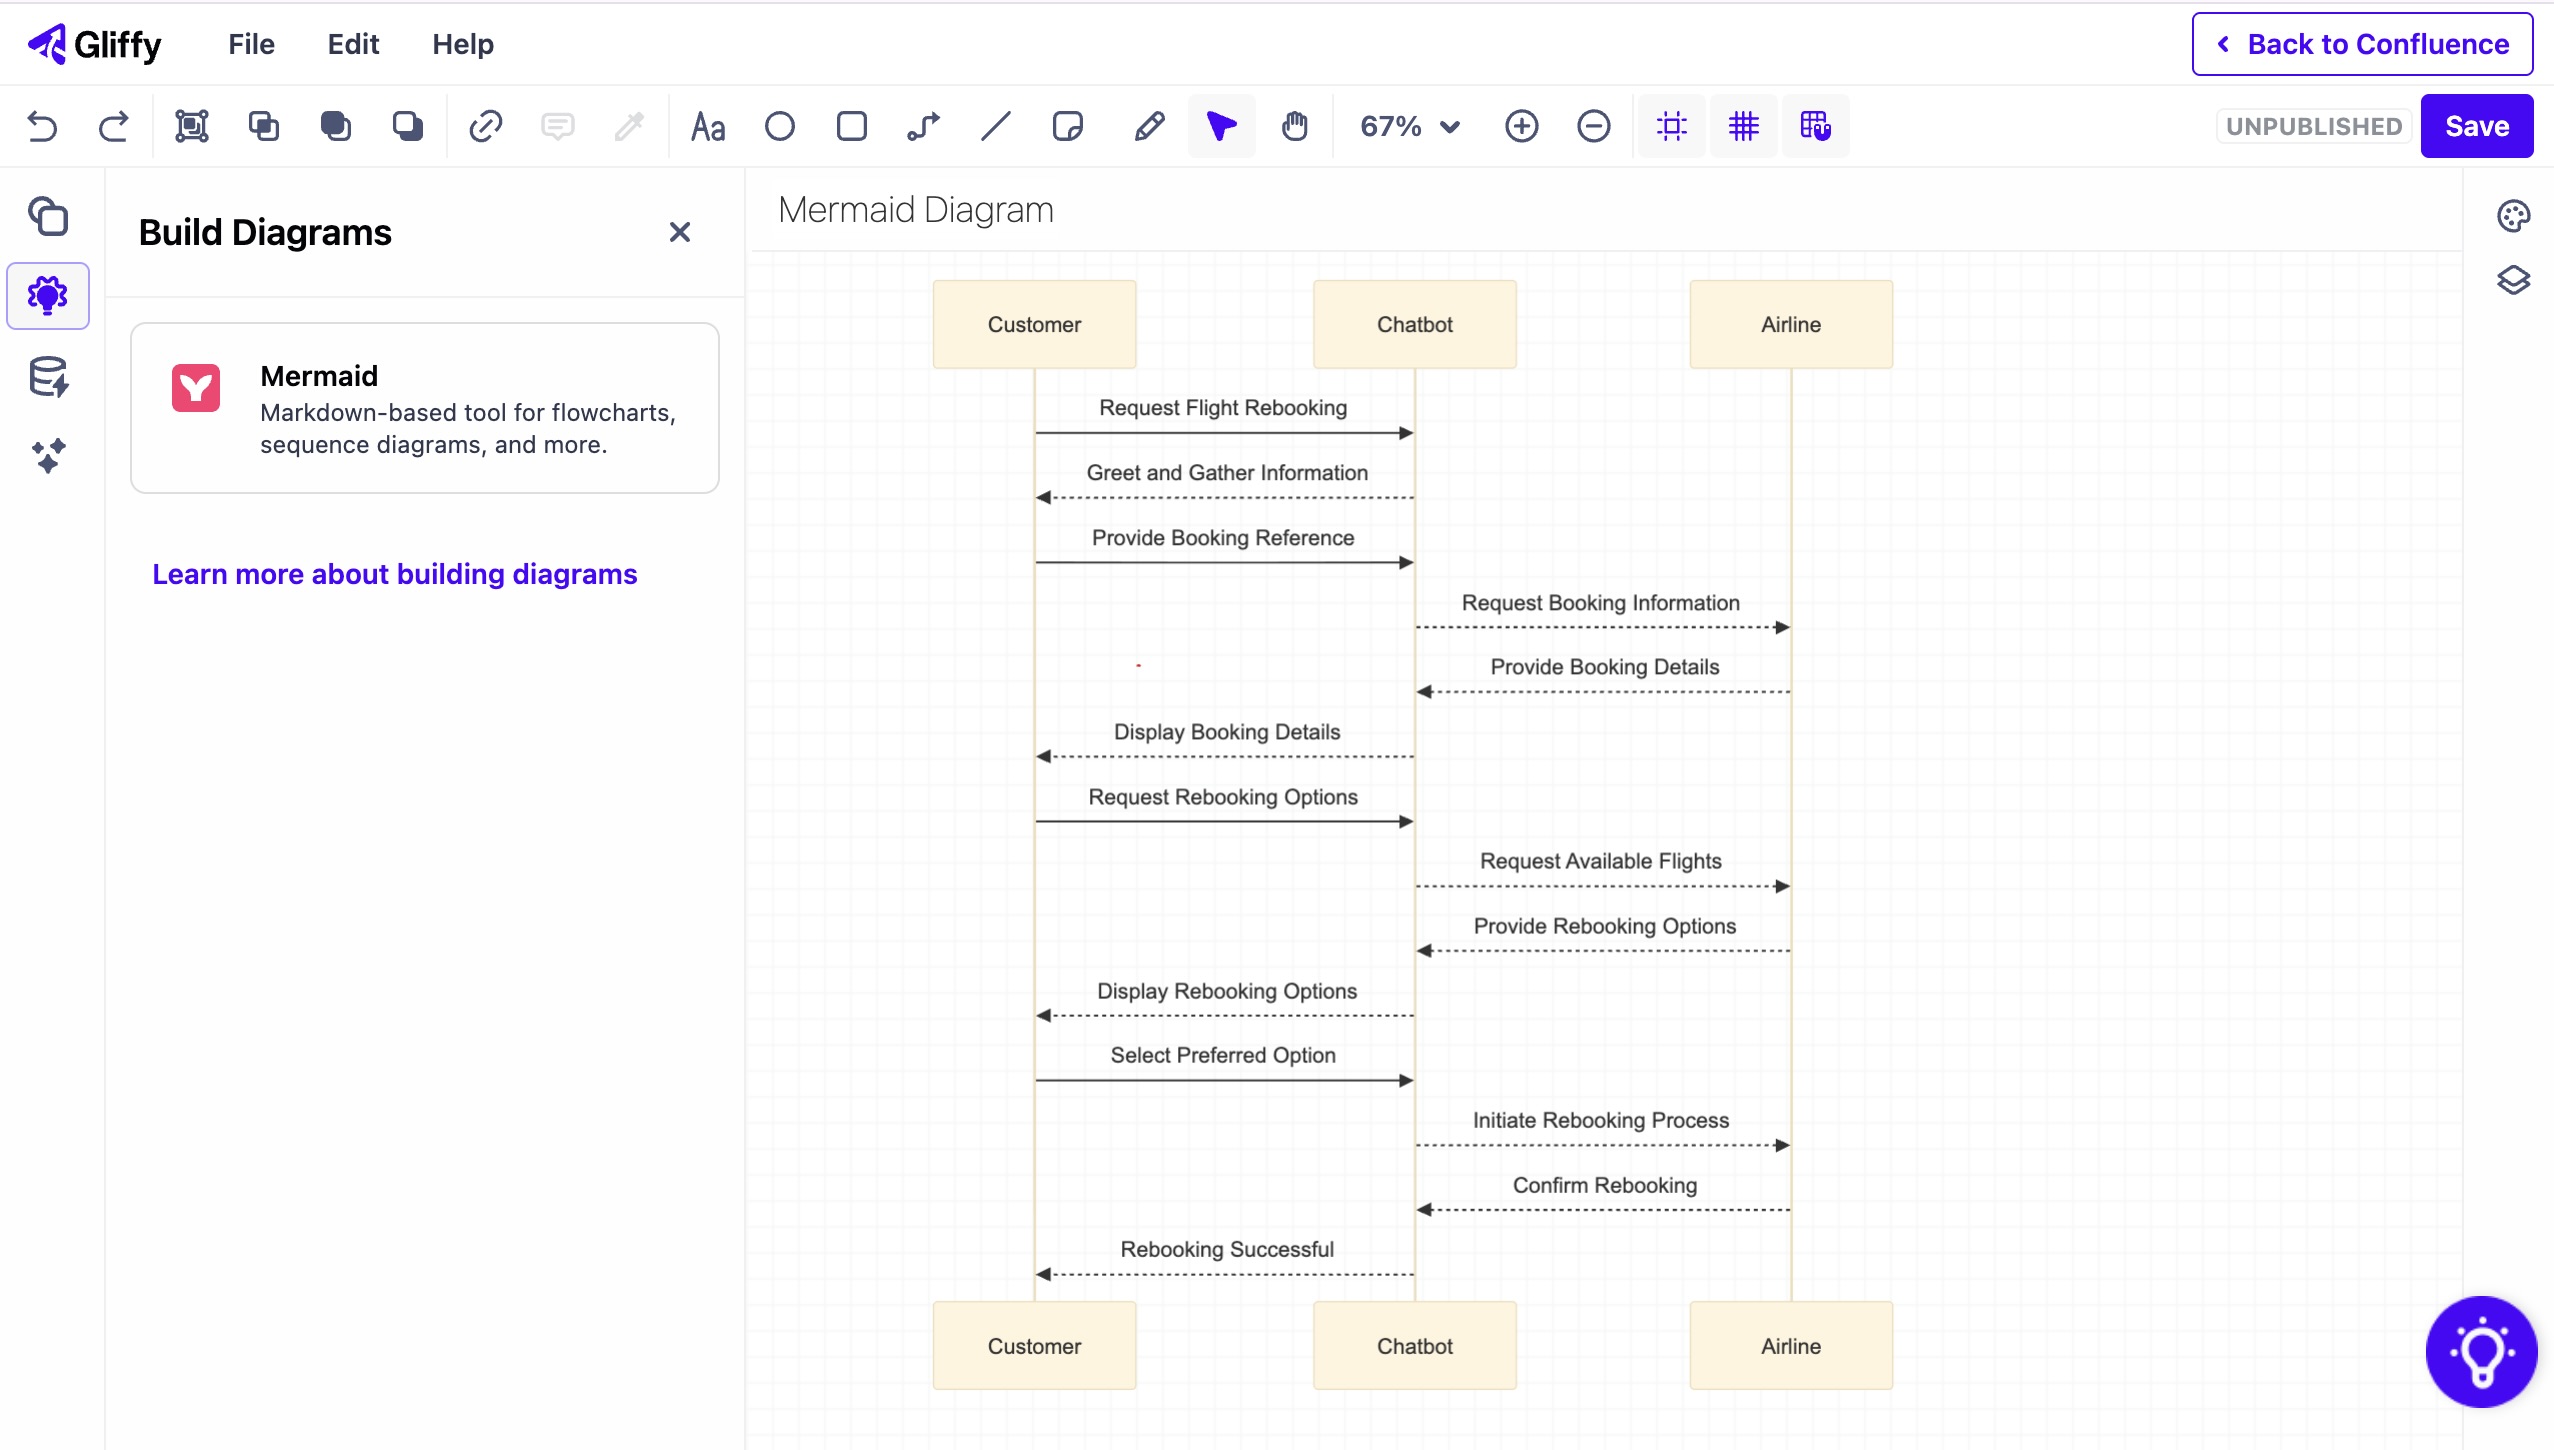
sequenceDiagram
    participant Customer
    participant Chatbot
    participant Airline

    Customer->>Chatbot: Request Flight Rebooking
    Chatbot-->>Customer: Greet and Gather Information
    Customer->>Chatbot: Provide Booking Reference
    Chatbot-->>Airline: Request Booking Information
    Airline-->>Chatbot: Provide Booking Details
    Chatbot-->>Customer: Display Booking Details
    Customer->>Chatbot: Request Rebooking Options
    Chatbot-->>Airline: Request Available Flights
    Airline-->>Chatbot: Provide Rebooking Options
    Chatbot-->>Customer: Display Rebooking Options
    Customer->>Chatbot: Select Preferred Option
    Chatbot-->>Airline: Initiate Rebooking Process
    Airline-->>Chatbot: Confirm Rebooking
    Chatbot-->>Customer: Rebooking Successful
State Diagram
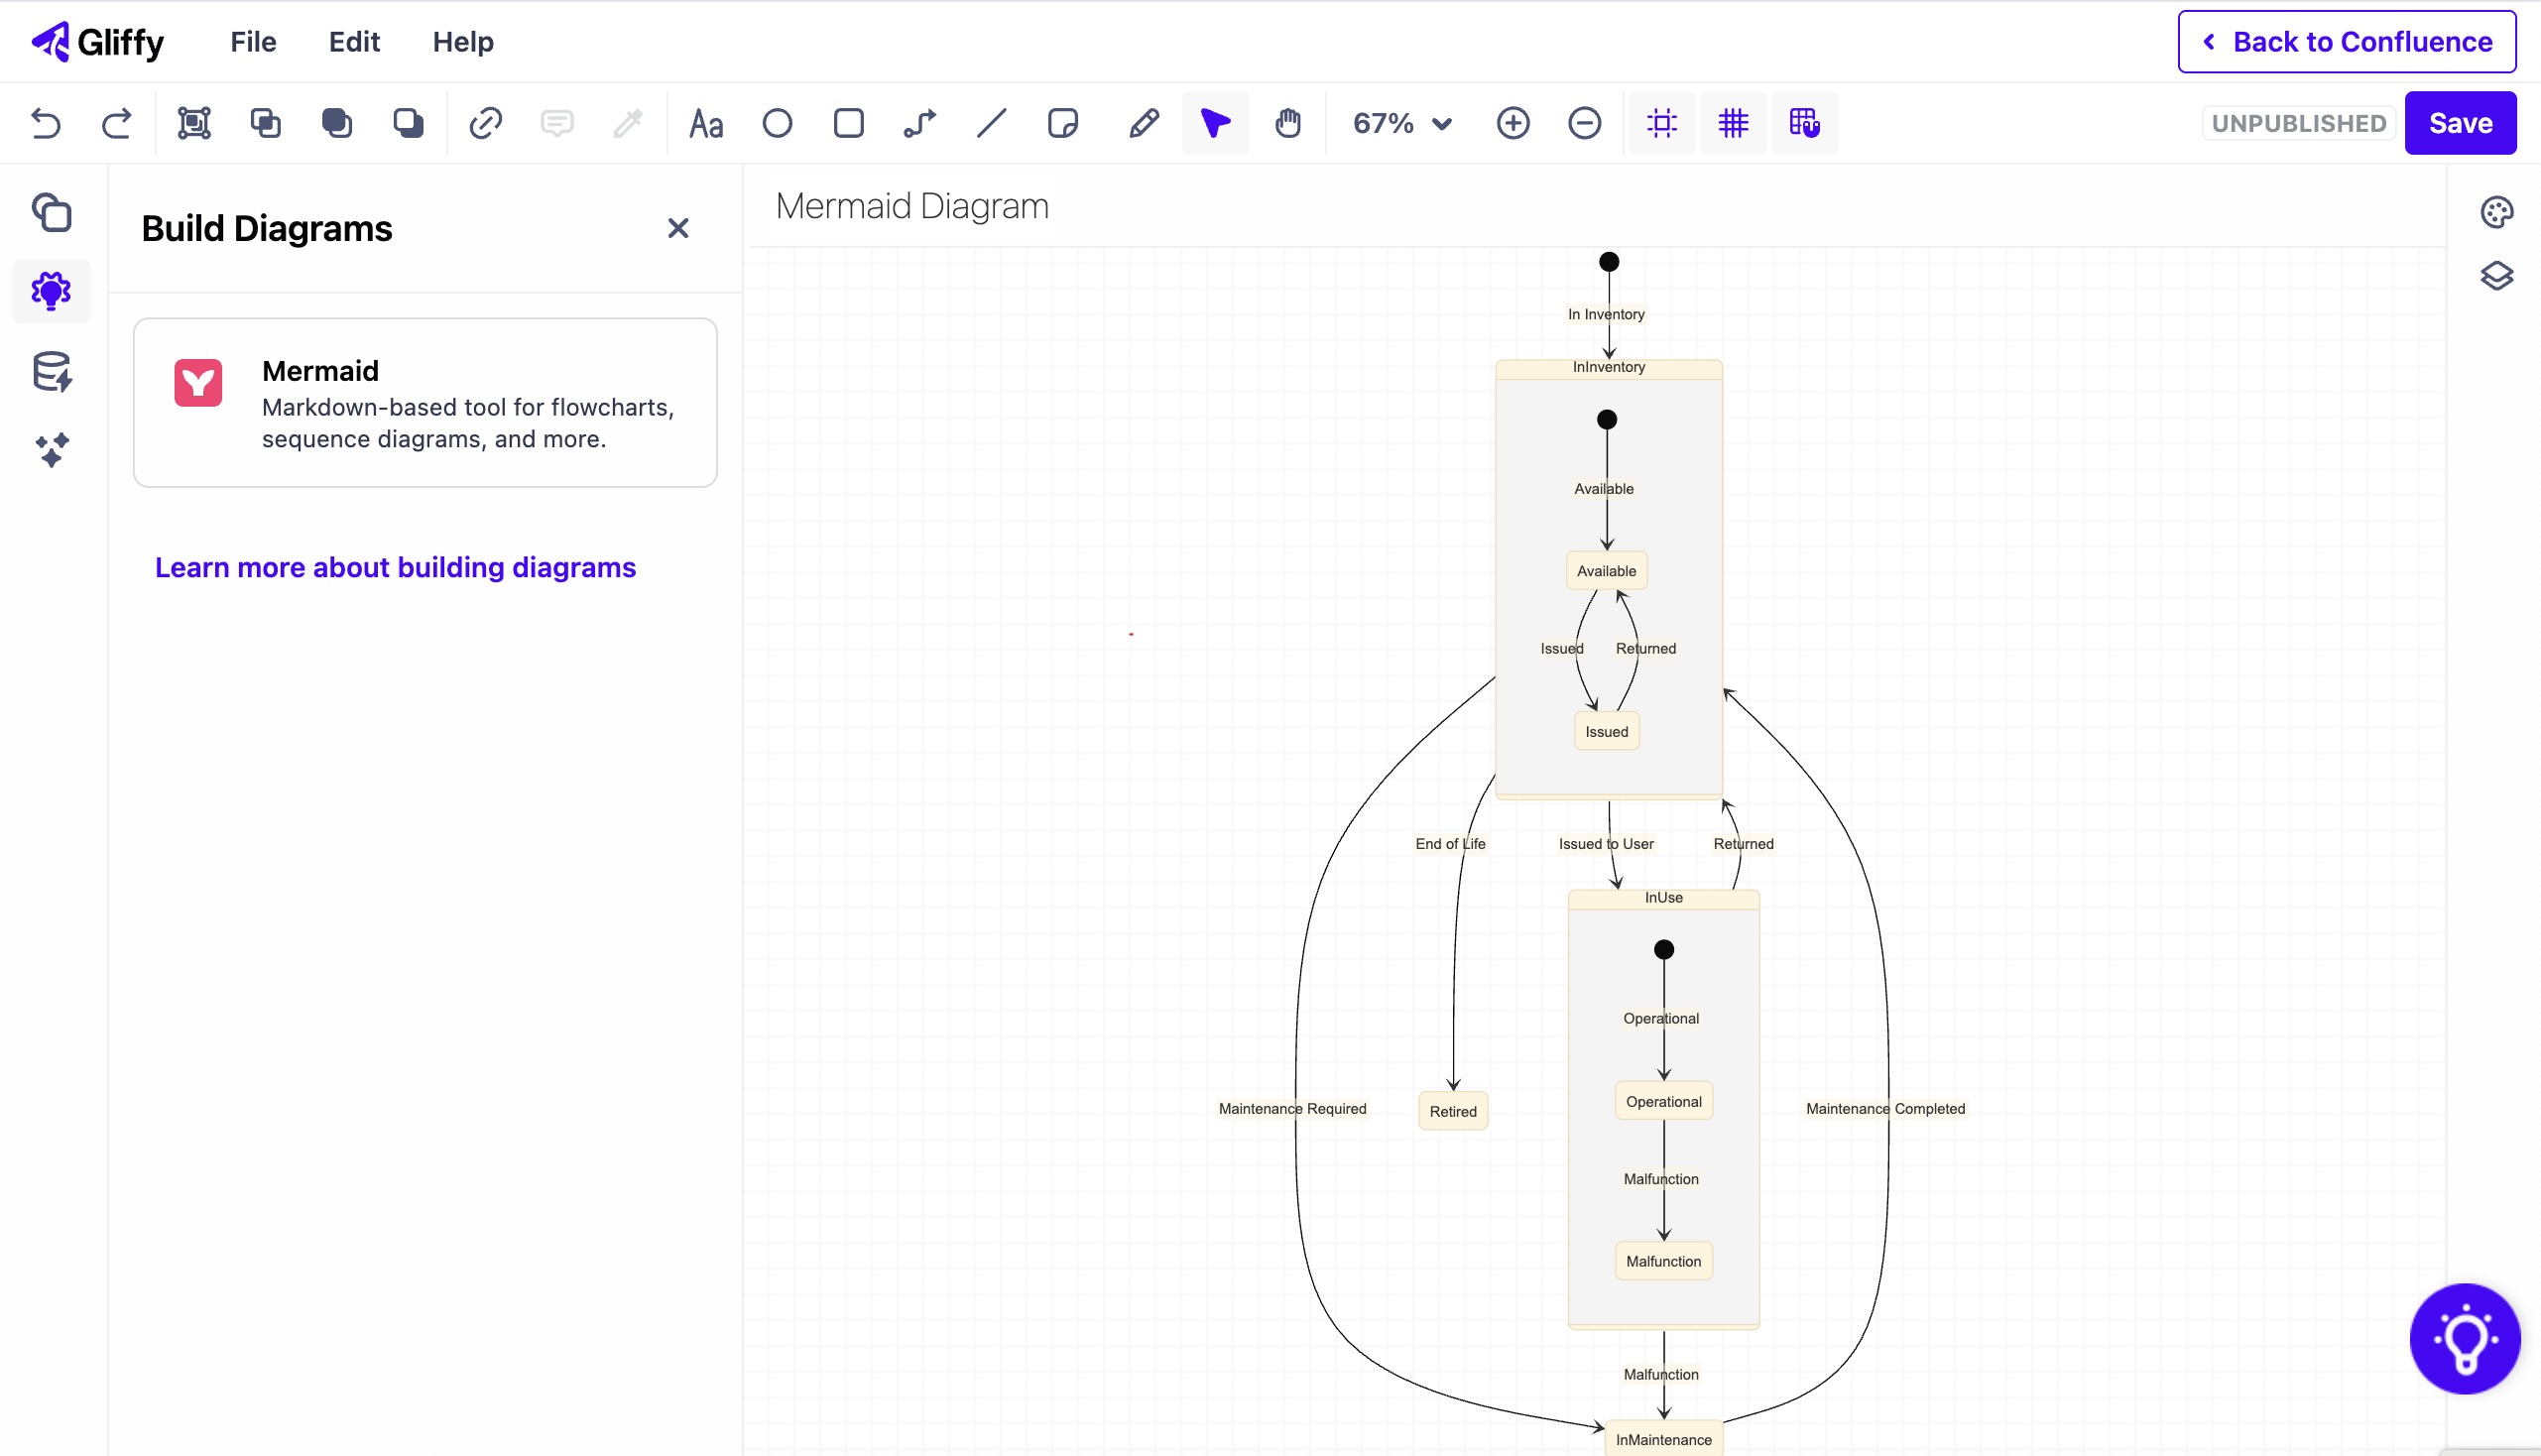
stateDiagram
    [*] --> InInventory: In Inventory
    InInventory --> InUse: Issued to User
    InInventory --> InMaintenance: Maintenance Required
    InMaintenance --> InInventory: Maintenance Completed
    InInventory --> Retired: End of Life
    InUse --> InMaintenance: Malfunction
    InUse --> InInventory: Returned

    state InInventory {
        [*] --> Available: Available
        Available --> Issued: Issued
        Issued --> Available: Returned
    }

    state InUse {
        [*] --> Operational: Operational
        Operational --> Malfunction: Malfunction
    }
Entity-Relationship Diagram
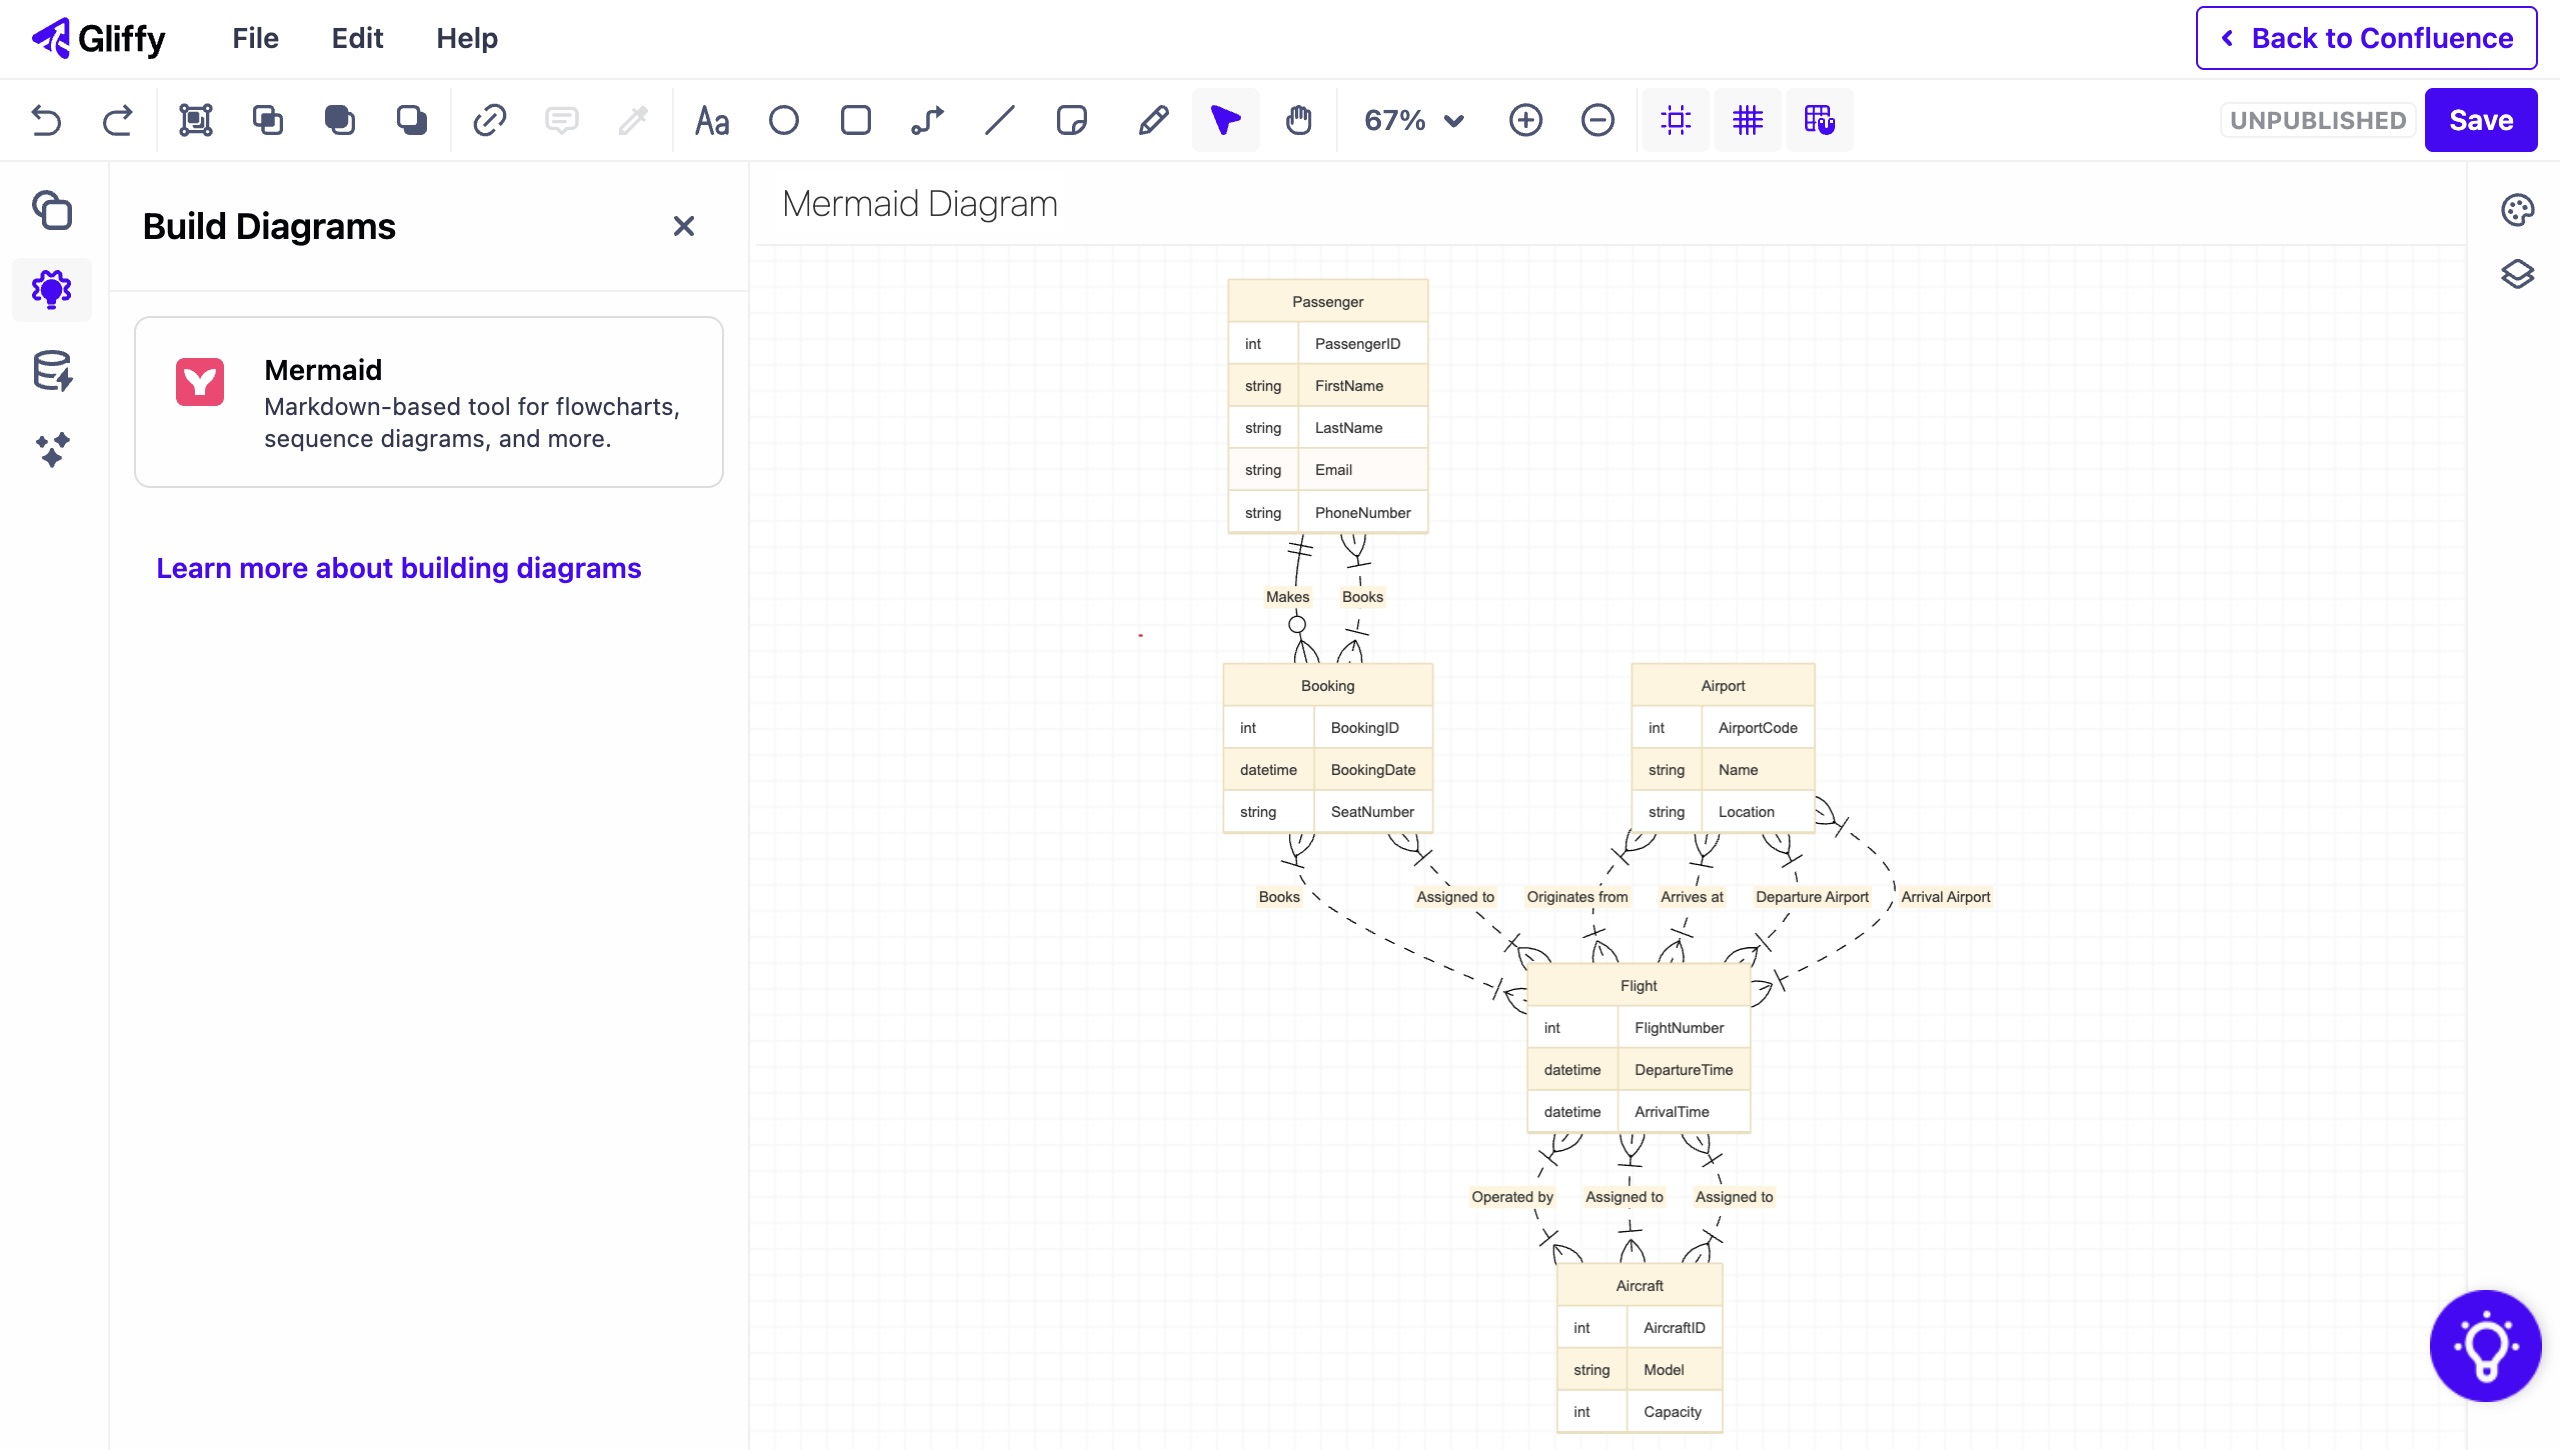
erDiagram
    Passenger ||--o{ Booking : "Makes"
    Booking }|..|{ Flight : "Books"
    Airport }|..|{ Flight : "Originates from"
    Airport }|..|{ Flight : "Arrives at"
    Flight }|..|{ Aircraft : "Operated by"
    Aircraft }|..|{ Flight : "Assigned to"

    Passenger {
        int PassengerID
        string FirstName
        string LastName
        string Email
        string PhoneNumber
    }
    Booking {
        int BookingID
        datetime BookingDate
        string SeatNumber
    }
    Airport {
        int AirportCode
        string Name
        string Location
    }
    Flight {
        int FlightNumber
        datetime DepartureTime
        datetime ArrivalTime
    }
    Aircraft {
        int AircraftID
        string Model
        int Capacity
    }

    Passenger }|..|{ Booking : "Books"
    Booking }|..|{ Flight : "Assigned to"
    Airport }|..|{ Flight : "Departure Airport"
    Airport }|..|{ Flight : "Arrival Airport"
    Flight }|..|{ Aircraft : "Assigned to"
Back to top
Generate a Code-Based Mermaid Diagram in Confluence
Whether you’re starting from scratch or using one of our samples, following the steps outlined here will set you up for success as you create your Mermaid diagram! Start your free trial of Gliffy so you can generate Mermaid diagrams directly in Confluence.