If you use Confluence regularly, you probably know how helpful visuals are for communication and collaboration. They make pages more engaging and easier to understand at a glance.
One of the best ways to make your content more visually appealing, especially if you’re communicating information about complex processes or structures, is by adding diagrams.
The easiest way to create diagrams in Confluence is with Gliffy, the Atlassian Marketplace’s original diagramming app. It’s enterprise teams’ go-to tool for creating diagrams and flowcharts that bring Confluence pages to life — and it’s free to try it out yourself.
This page will walk you through how to insert diagrams in Confluence using the Gliffy add-on, including a video tutorial and step-by-step instructions.
Back to topTutorial: Creating Gliffy Diagrams in Confluence
This brief tutorial will guide you through the steps of creating a Gliffy diagram on a Confluence page. If you’d prefer to read step-by-step instructions, continue scrolling to read our 5-step guide to creating Confluence diagrams.
How to Insert Diagrams and Flowcharts In Confluence
1. Go into editing mode on any Confluence page and type “/gliffy”, then select the “Gliffy Diagram” option that appears.

Note: You’ll need to make sure you have Gliffy installed before trying to create a diagram. If it’s not installed, either start your free trial or, if you don’t have admin access, learn how to request Gliffy.
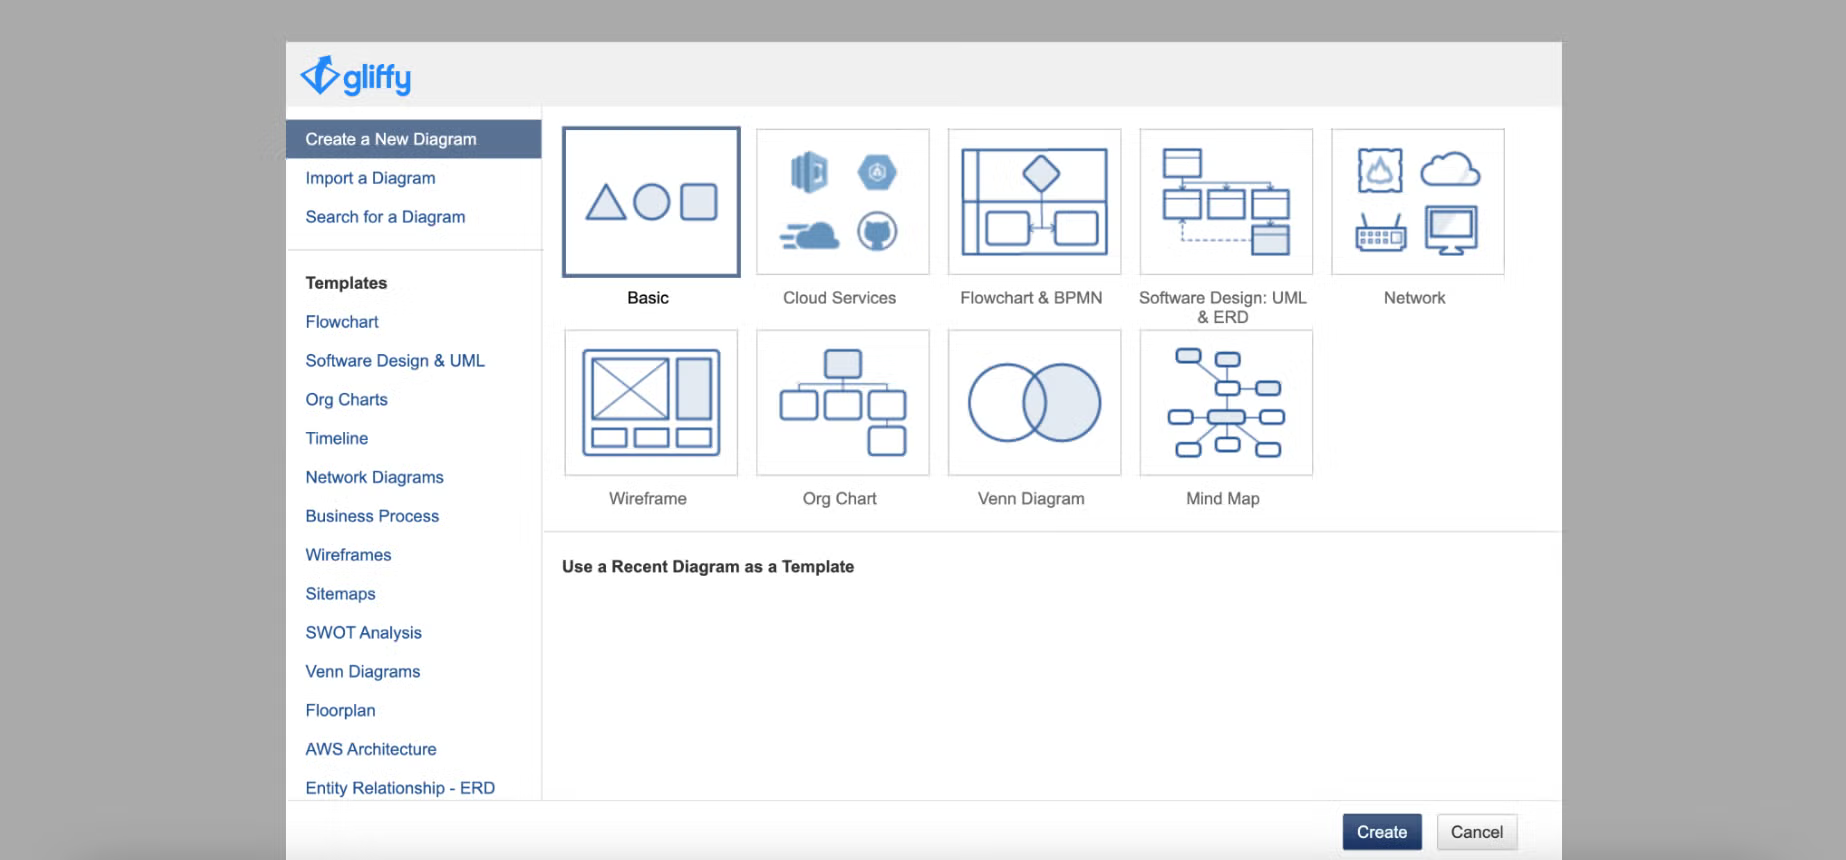
2. Either select a template you’d like to work with or just click “Create” to start with a blank diagram and basic shapes.
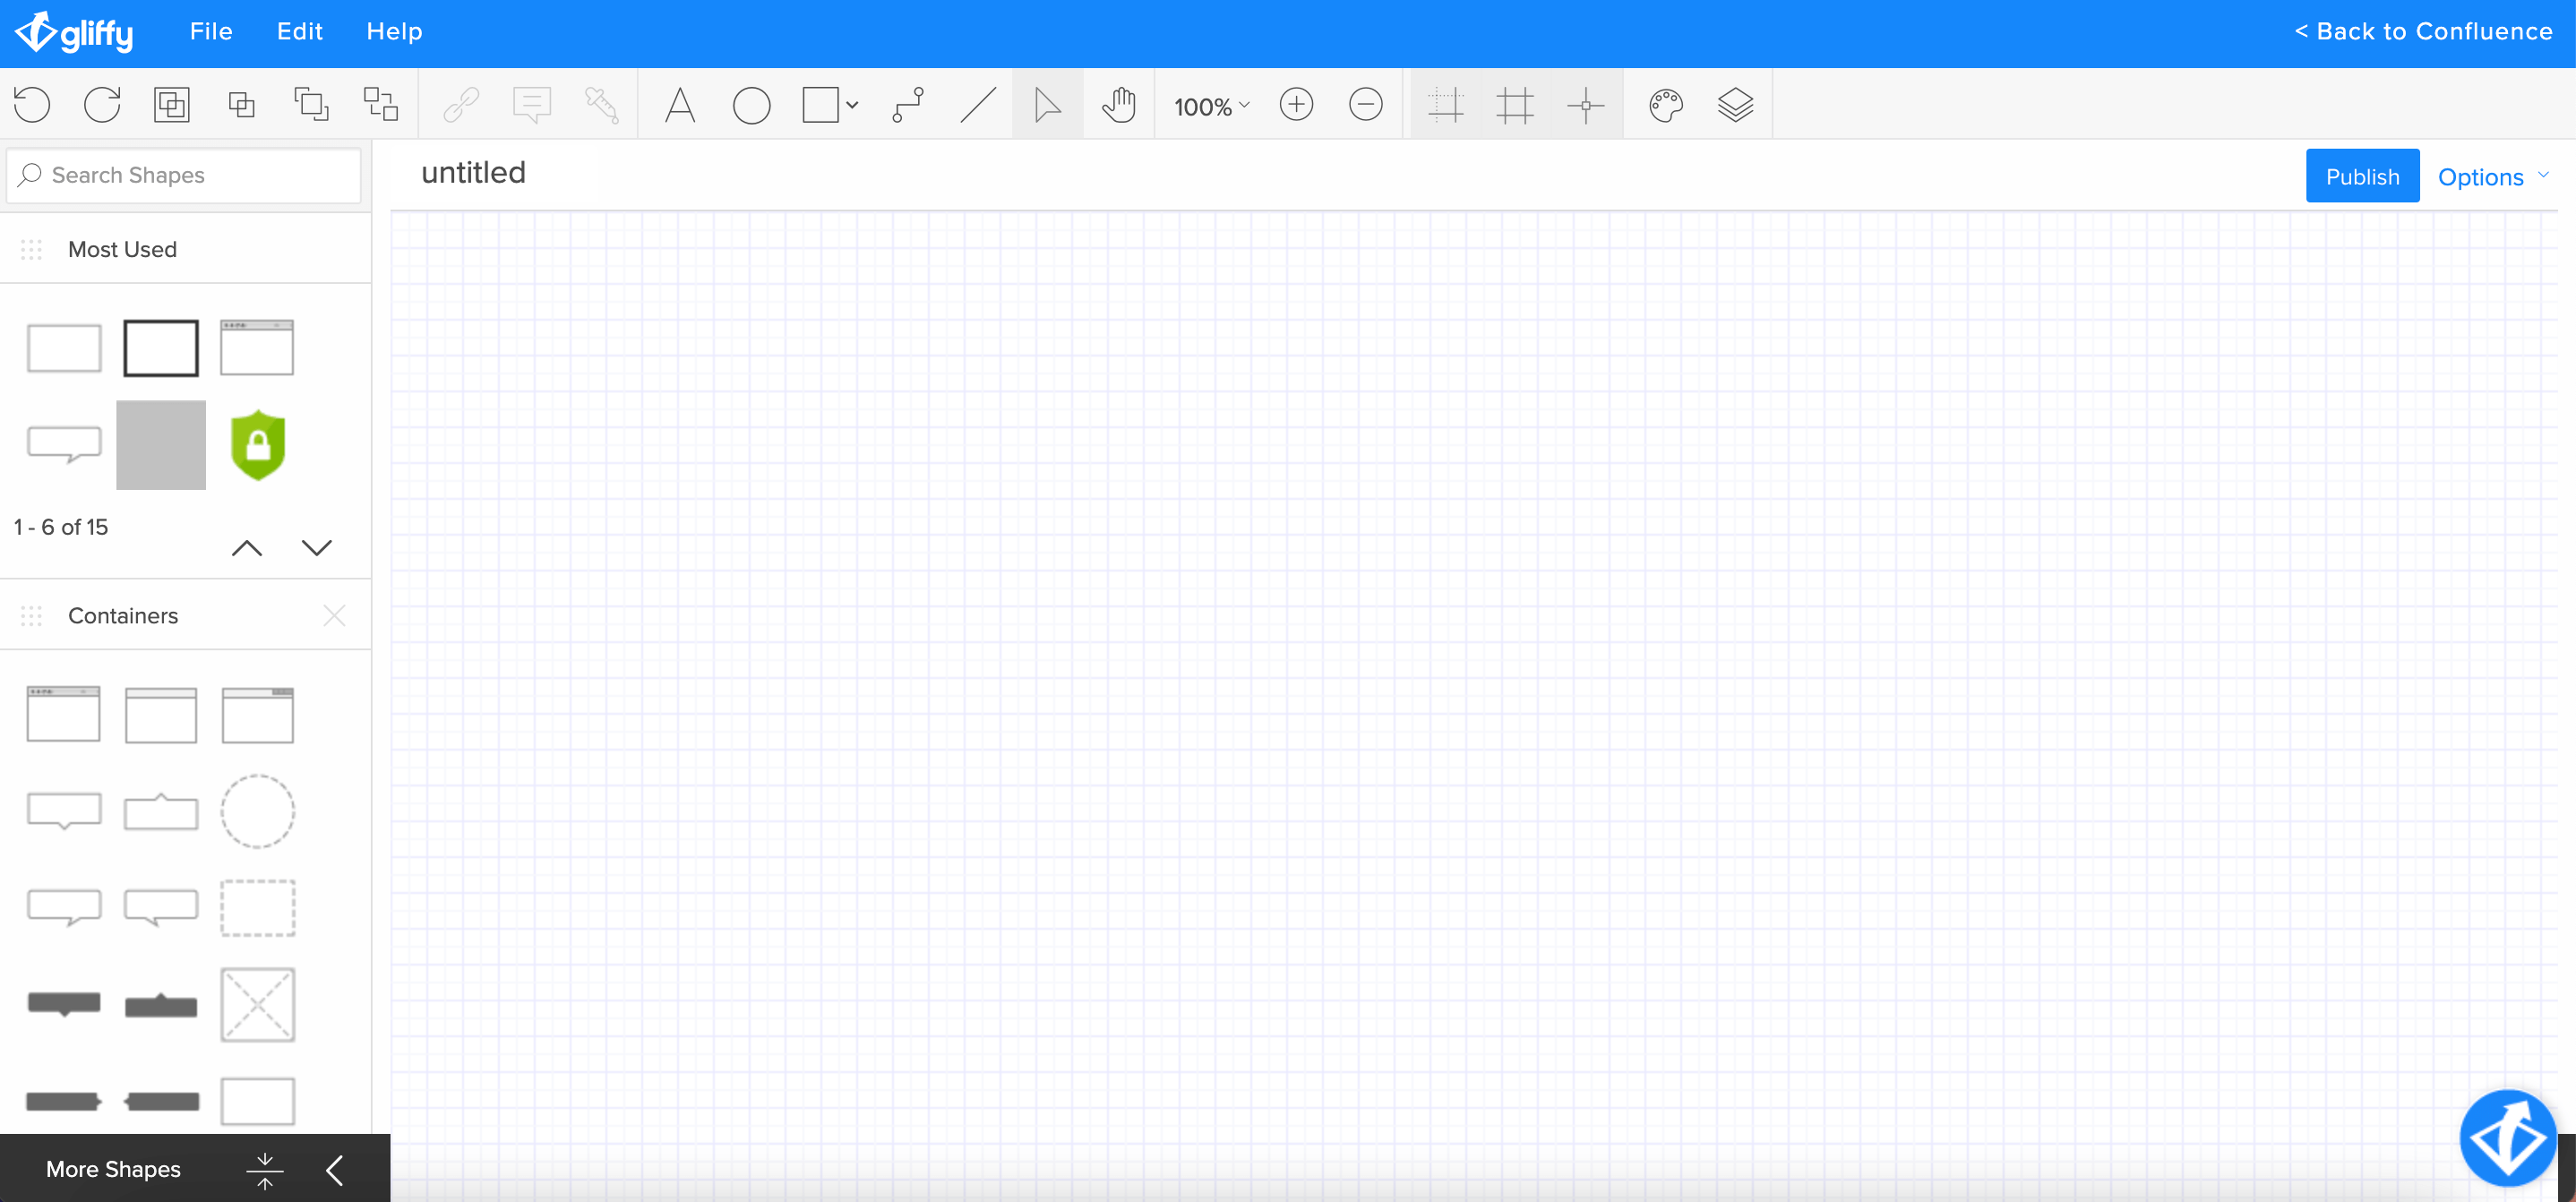
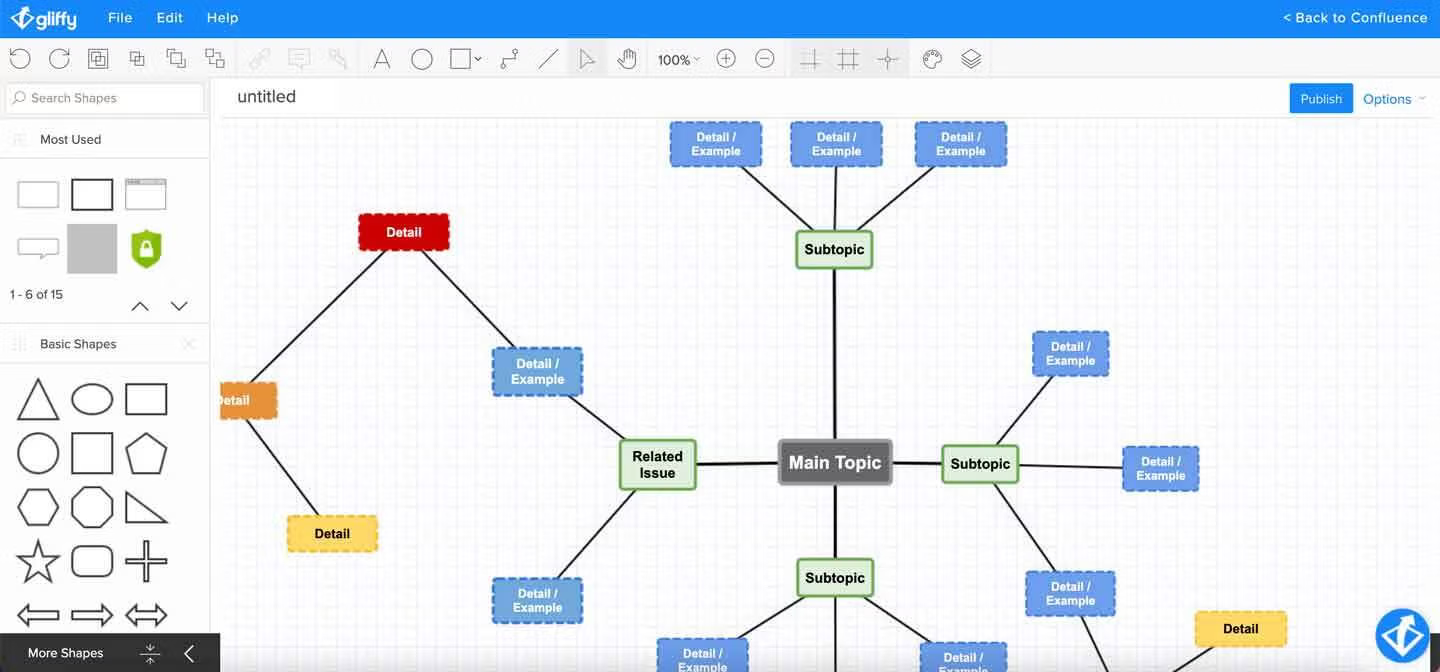
3. Create your diagram or flowchart by dragging and dropping shapes onto the canvas, or generate a Mermaid diagram from text (see tutorial).
Note: Need help getting started? Check out our Getting Started video tutorials or visit Gliffy’s help center.
4. When your diagram is done, click “Publish” and then “Back to Confluence” in the upper right-hand corner. You can always go back to make further edits later.
Note: If you haven’t given your diagram a name already, you’ll be prompted to do so before publishing.
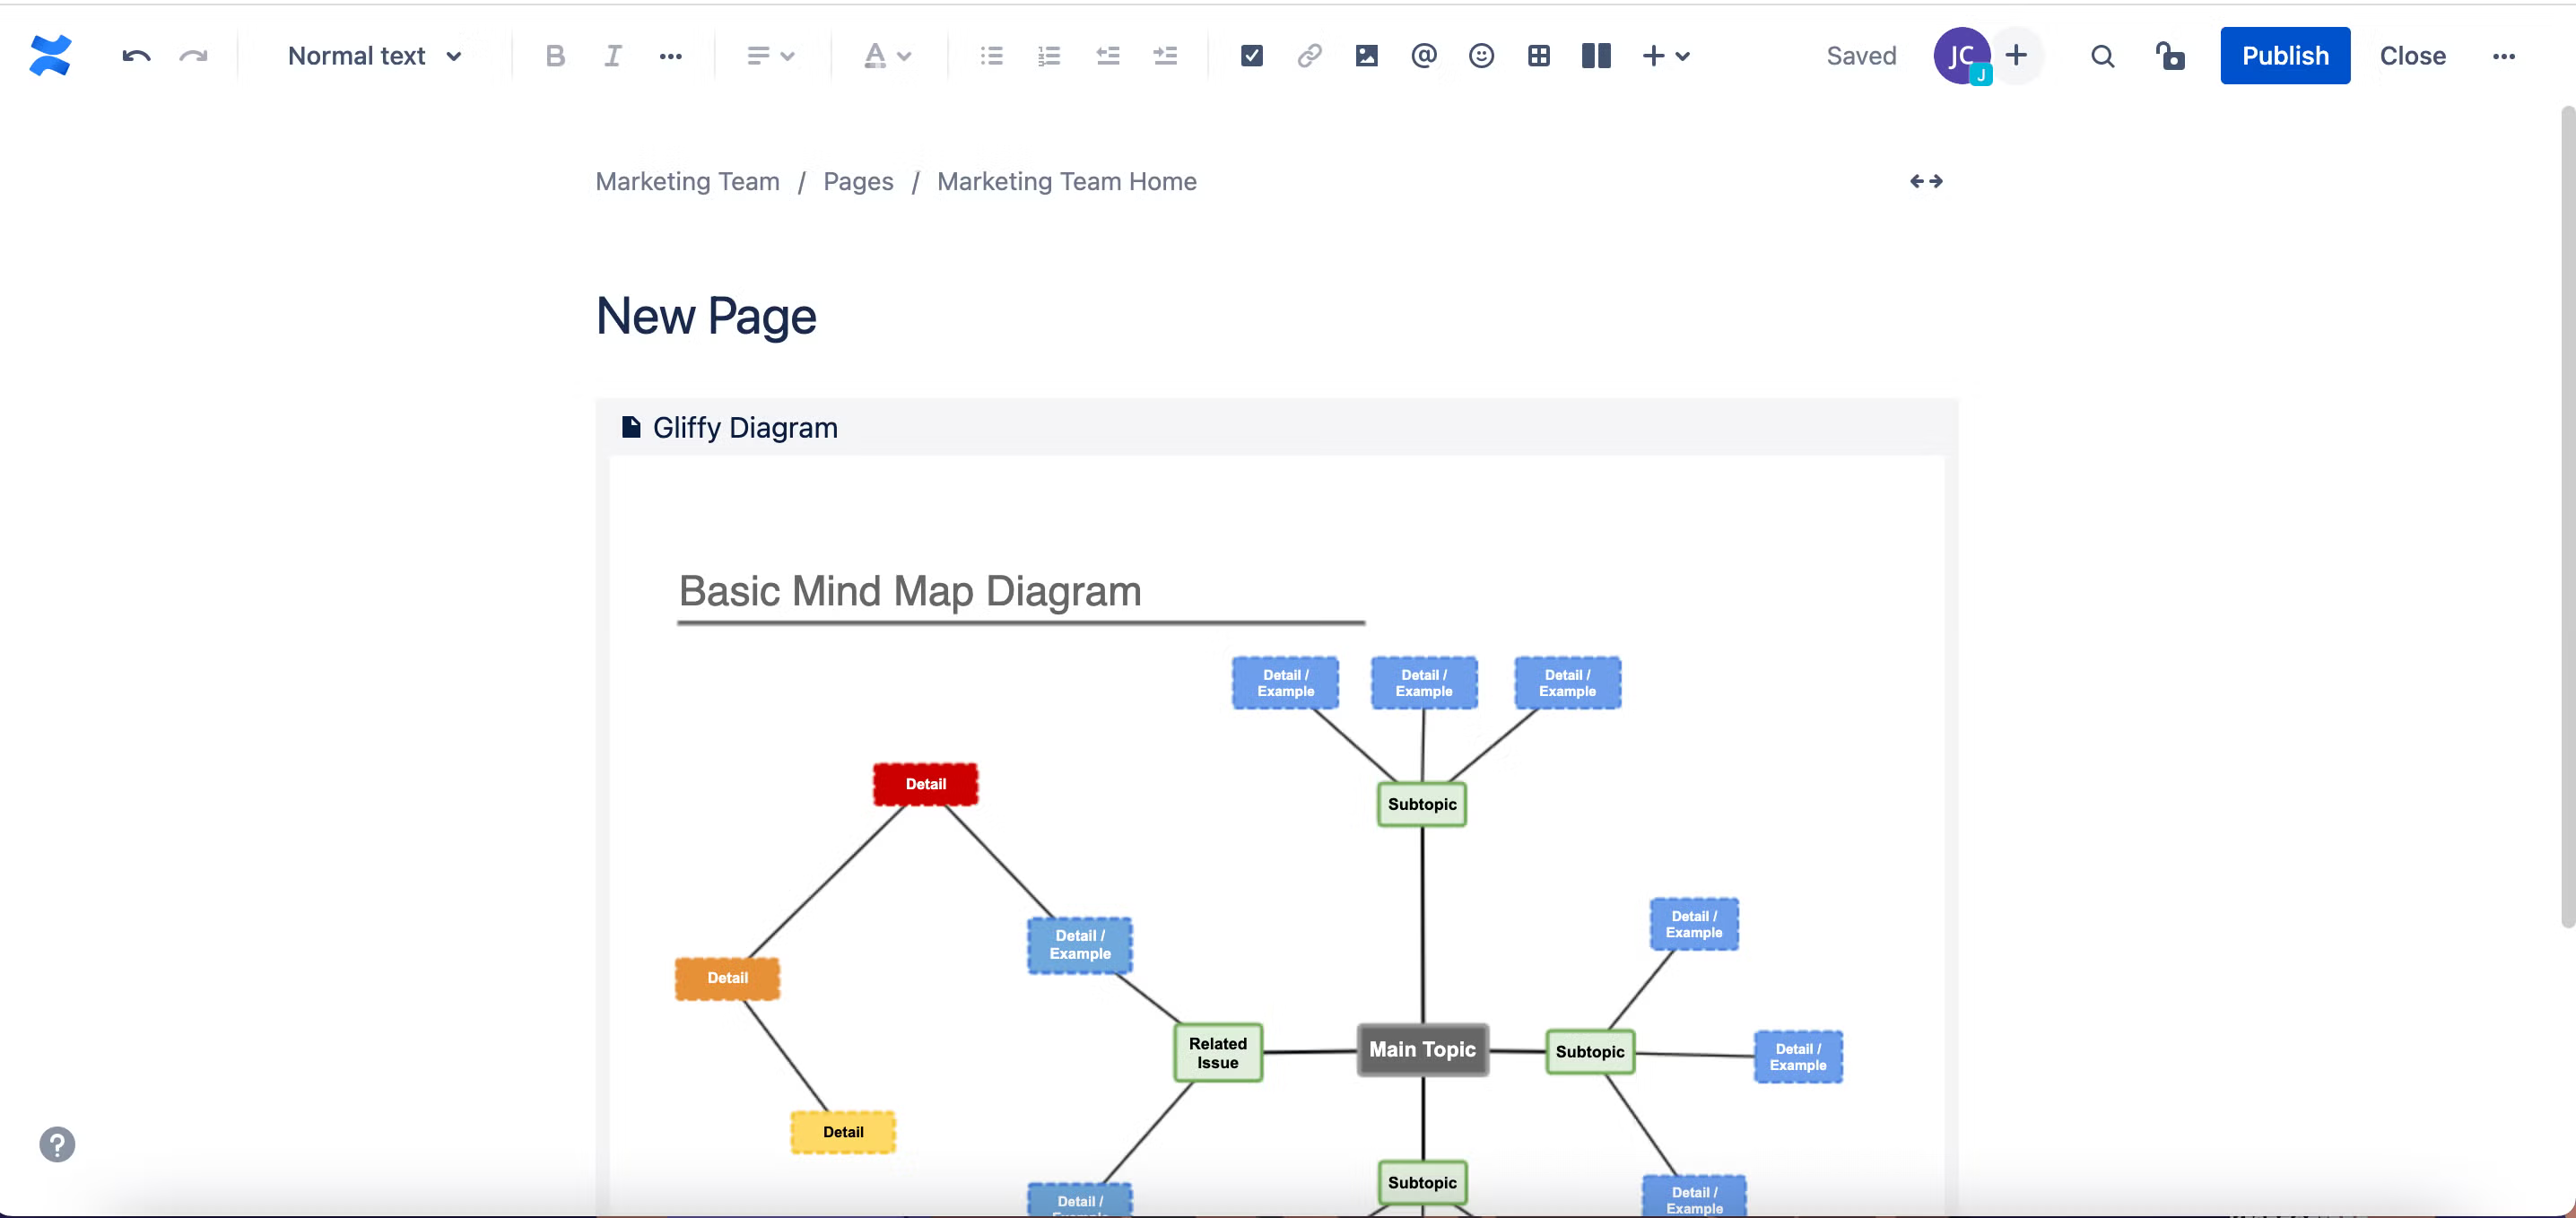
5. After publishing and returning to Confluence, you should be able to view your diagram on the Confluence page.
Back to topNote: Want to embed a diagram you’ve already created on another page? Visit our guide to inserting existing Gliffy diagrams.
Find Your Diagrams in Confluence
As you grow your diagramming skills and create more visuals for your Confluence space, you'll soon have more diagrams than you can count illustrating all your ideas, processes, and more!
If you're looking for a specific diagram quickly and can't remember exactly which page it's on, the best way to find it is through the Gliffy lobby.
To get to the lobby, simply click "Gliffy Diagram" in the Confluence sidebar, and you'll see all your diagrams in either list or grid view. You can organize them by name or last modified date, and search for any diagram by name.
Want to see the lobby in action? Watch this quick video tutorial:
Start Building Your Own Confluence Diagrams
If you haven’t yet, make sure to start your free Gliffy trial so you can start creating powerful diagrams and flowcharts directly in Confluence. Your team will thank you!
New to using Confluence? Check out some of our other resources to help you get up to speed and make the most of your collaborative space.
✏️ Resource: The Ultimate Guide to Confluence
✏️ Blog: Building Effective Confluence Documentation
✏️Blog: Confluence Formatting Guide
✏️ Blog: Creating Engaging Confluence Pages
✏️ Blog: Confluence Best Practices to Improve Collaboration